
How to use every tool in the Sculpt3D app on Mac, iPad, iPhone, Windows and Android: what each tool does, how to run it step by step, its shortcut, and what the result looks like.
Looking for the AI / MCP tools instead? See MCP Tools Reference. Most in-app tools have an MCP twin; each section below links to it.
Contents
- The workspace
- Navigation and selection
- How every tool works (the operation panel)
- Project and Items
- Sketch
- Insert
- Construct
- Transform
- Tools (solid modeling)
- View, Measure and Section
- Visualize
- History, variables and undo
- Export
- Keyboard shortcuts
Units are millimetres and degrees. Z is up: the Top plane is XY, Front is XZ, Right is YZ.
1. The workspace
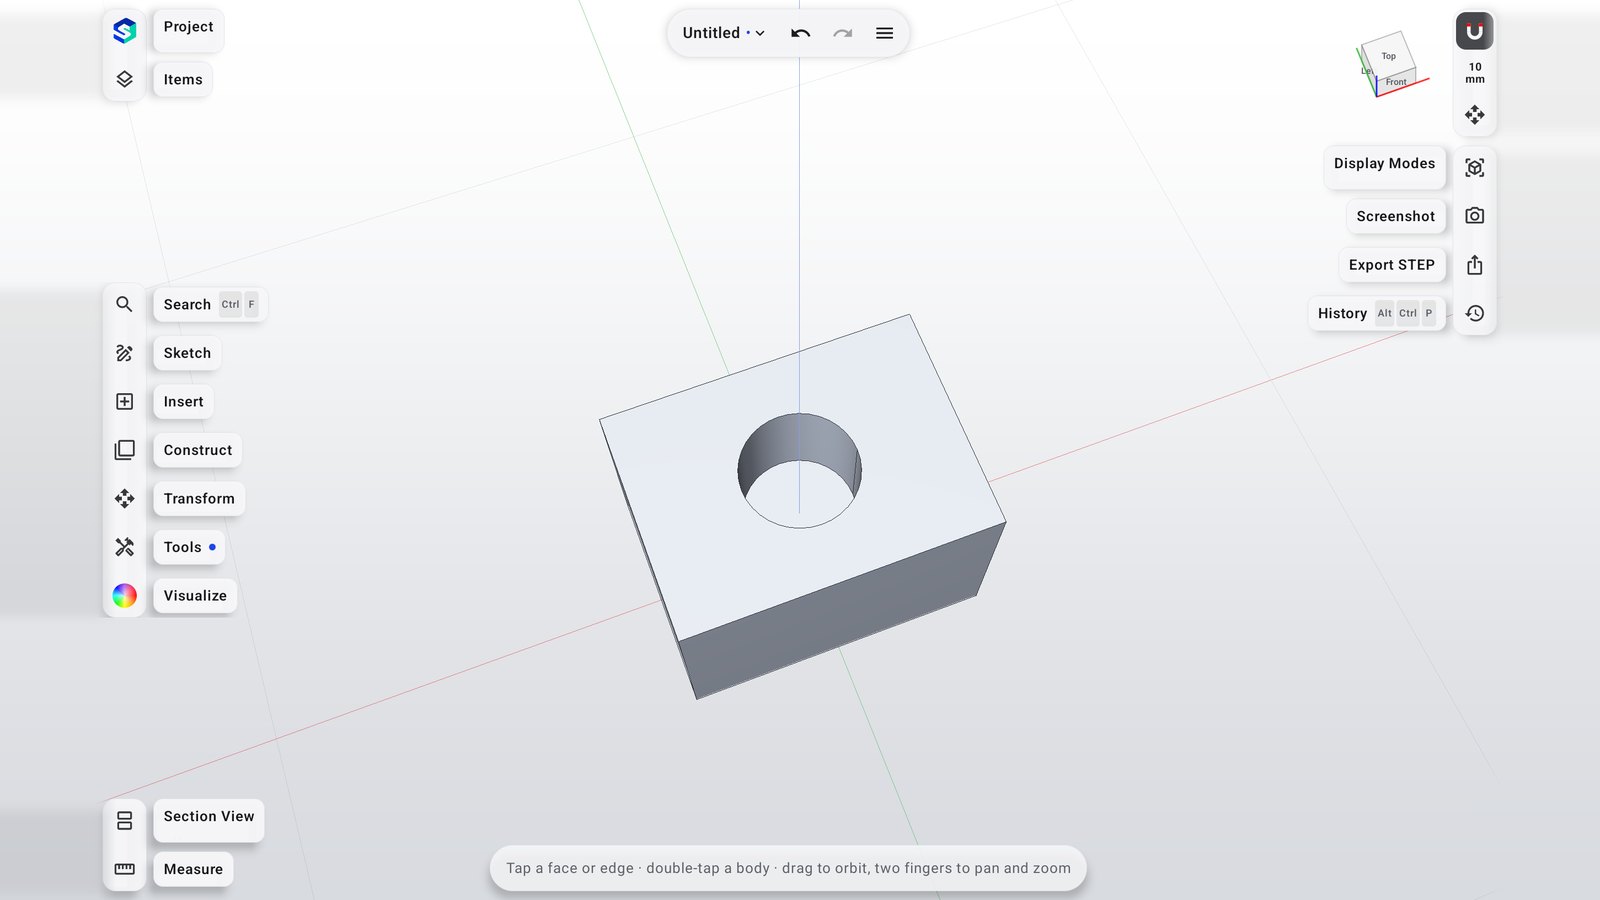
| Area | What it holds |
|---|---|
| Left rail | Project (units, snapping), Items (bodies, sketches, planes, axes, images), Search (⌘F), then the tool groups Sketch, Insert, Construct, Transform, Tools, Visualize. Each icon has a label pill and its shortcut key caps. A blue dot marks a group whose tools fit the current selection. |
| Right rail | View cube, Display Modes, Screenshot, Export STEP, History (⌥⌘P). |
| Bottom left | Section View and Measure. |
| Top bar | Document name, undo/redo, and the app menu. |
| Bottom hint | A one-line tip for the current mode (e.g. Tap a face or edge · double-tap a body …). |
The rail changes with the mode: modeling, sketching, measuring or Visualize. On iPhone the labels collapse into icons; tap an icon to open its group.
On Mac the menu bar mirrors every group (Model, Sketch, Insert, Construct, Transform, Tools, View, Camera), so every tool is also reachable from a menu with its shortcut.
Search (⌘F)
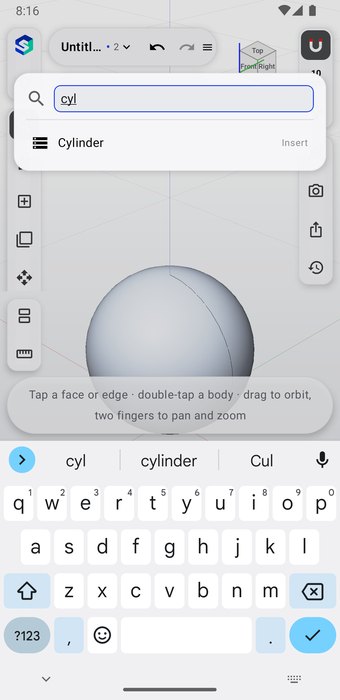
Press ⌘F (or tap Search) and type part of a tool name — "fil" finds Fillet, "mir" finds Mirror. Tools that need a selection are listed with a hint ("Select edges") until you select something.
2. Navigation and selection
| Action | Mac (mouse/trackpad) | iPad / iPhone / Android |
|---|---|---|
| Select a face or edge | Click | Tap |
| Add to selection | ⇧-click or ⌘-click | Tap more |
| Select a whole body | Double-click | Double-tap |
| Orbit | Drag, or two-finger scroll | One-finger drag |
| Pan | ⌥-drag or ⇧-scroll | Two-finger drag |
| Zoom | Pinch or mouse wheel | Pinch |
| Fit everything | ⇧⌘F | View ▸ Zoom to Fit |
| Clear selection | Esc | Tap empty space |
| Delete selection | ⌘⌫ | Delete in the action bar |
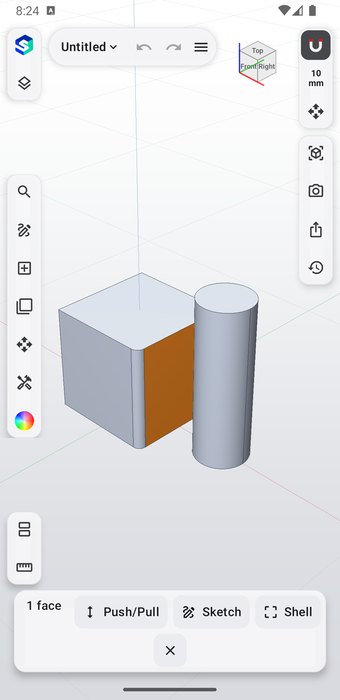
When something is selected, a contextual action bar offers the tools that fit it — e.g. a face offers Push/Pull, Sketch on Face, Offset; edges offer Fillet and Chamfer.
Show/Hide, Isolate and Zoom to live in the Model menu (and the Items list): hide a body to work behind it, or isolate one body to see only it.
3. How every tool works
Every modeling tool follows the same pattern:
- Select what the tool needs (the rail hint tells you: "Select edges", "Select two bodies"…).
- Run the tool (rail, menu, search, shortcut or action bar).
- A live operation panel opens with the tool's values. The model previews the result as you type or drag.
- Press Done (Return) to commit, or Cancel (Esc).
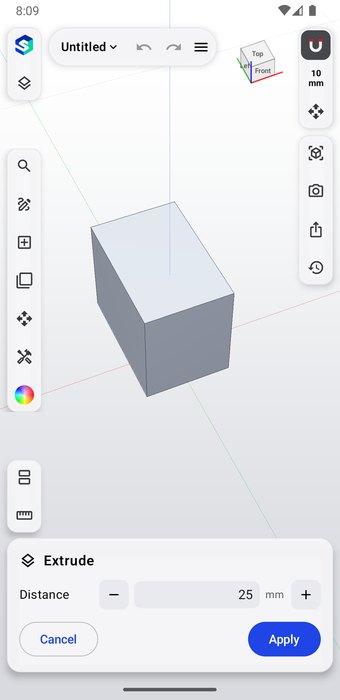
Every committed tool becomes a step in the History. You can reopen any step later and change its values; everything after it rebuilds. Number fields accept expressions and variables (width / 2, wall * 3 + 1).
4. Project and Items
Project
Opens document settings: units, snapping, and the project name.
Snapping (magnet icon) controls what the cursor locks to while sketching and moving:
- Grid — fixed or automatic grid size
- Guide lines — alignment with existing points
- Guide points — midpoints and circle quadrants
- 3D points — body corners, with hints
Items
Lists everything in the document: bodies (and body groups), sketches, planes, axes and reference images. For each item you can select, rename, show/hide and open properties. Selecting a sketch here is how you feed it to Extrude, Revolve, Loft, Sweep or Pipe.
5. Sketch
Sketches are 2D drawings on a plane. Closed shapes become profiles for Extrude, Revolve, Loft and Sweep.
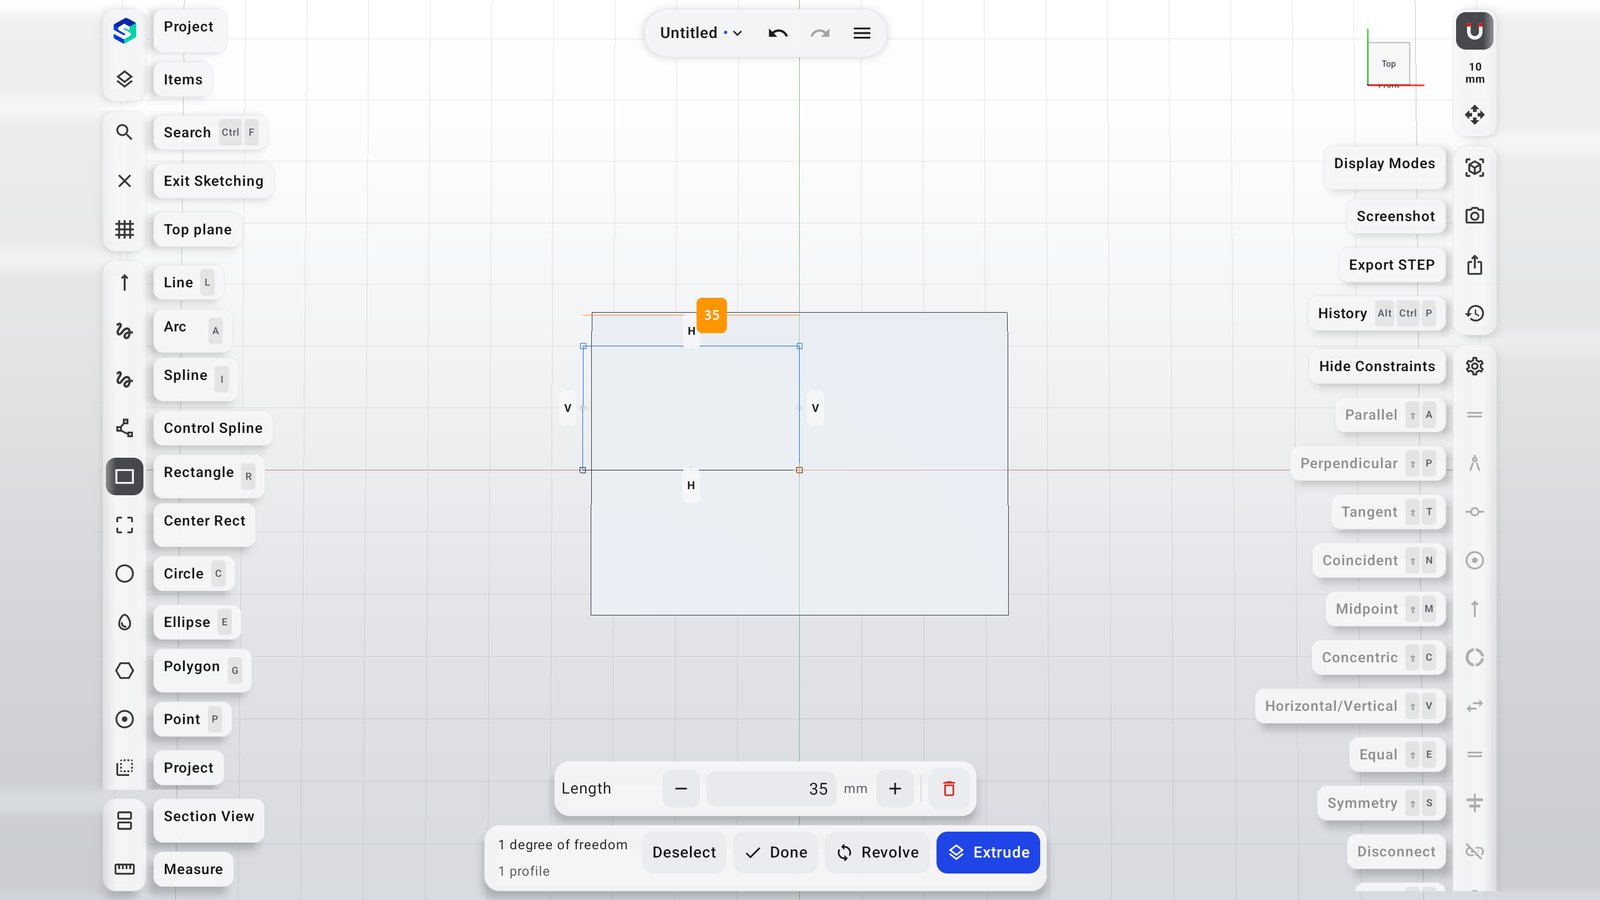
Starting a sketch
| Tool | How to use | Shortcut |
|---|---|---|
| Sketch on Top Plane | Starts a sketch on XY. | K |
| Sketch on Front Plane | Starts a sketch on XZ. | — |
| Sketch on Right Plane | Starts a sketch on YZ. | — |
| Sketch on Face | Select a flat face first, then run. The sketch sits on that face. | — |
| Sketch on Plane | Select a construction plane in Items, then run. | — |
| Edit Sketch | Select a sketch in Items, then run to reopen and change it. | — |
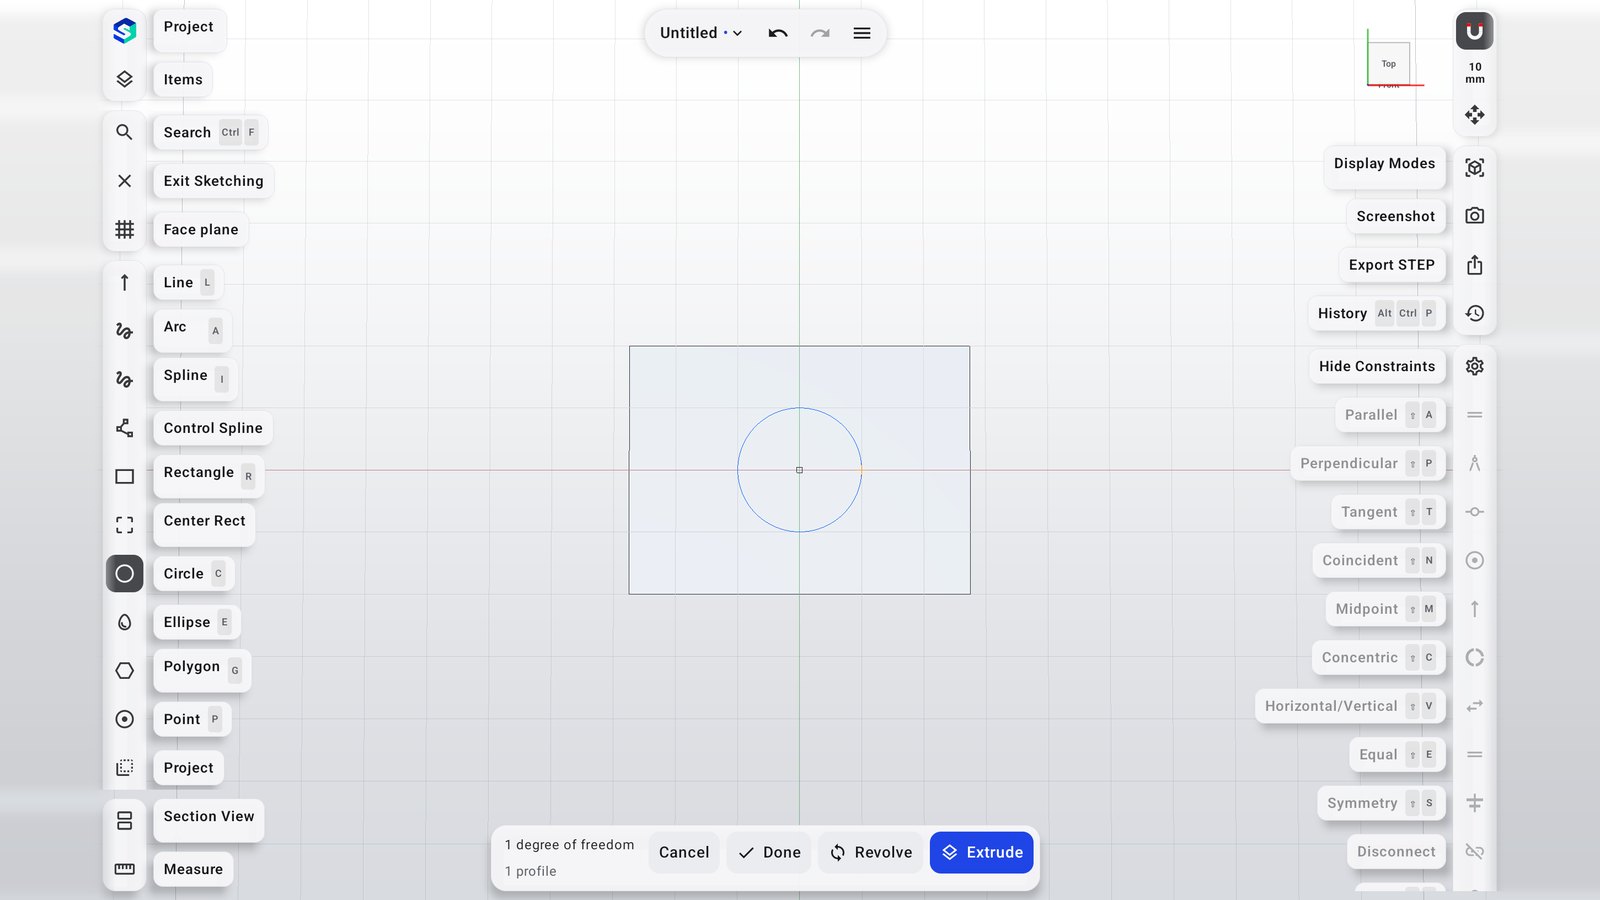
Drawing tools
| Tool | Key | How to use |
|---|---|---|
| Select | S | Click points, lines and circles to select them; the constraint bar then offers what fits. |
| Line | L | Click point after point. Esc ends the chain. Click the first point to close a profile. |
| Arc | A | 3-point arc: start, end, then a point on the arc. |
| Spline | I | Click points; a smooth curve passes through them. |
| Control Spline | — | Points act as control points that pull the curve (smoother, not through the points). |
| Rectangle | R | Two clicks: opposite corners. |
| Center Rect | — | First click is the centre, second a corner. |
| Circle | C | Click the centre, then the radius. |
| Ellipse | E | Centre, then the two radii. |
| Polygon | G | Centre, then a corner; set the number of sides in the panel. |
| Point | P | A single point, e.g. a hole centre or a reference. |
| Trim | T | Click a segment to cut it back to the nearest intersections. |
Editing tools
| Tool | How to use |
|---|---|
| Project | Projects body edges into the sketch so you can draw against them. |
| Offset Edge (O) | Select curves, then offset them by a distance (e.g. a wall of a set thickness). |
| Fillet | Select a corner where two lines meet, set a radius. |
| Delete | Removes the selection (or ⌘⌫). |
| Construction | Toggles selected curves to construction geometry: visible guides that are not part of the profile. |
| Text… | Adds outlined text to the sketch (for embossing or cutting lettering). |
| Scale / Pattern – Linear / Pattern – Circular / Rotate / Mirror Sketch | Sketch menu: transform the selected curves inside the sketch. |
| Undo | Works inside the sketch, step by step. |
Constraints (right side)
Select geometry, then tap a constraint. Only constraints that fit the selection are enabled.
| Constraint | Effect |
|---|---|
| Parallel | Two lines run the same direction. |
| Perpendicular | Two lines meet at 90°. |
| Tangent | A line/arc touches a circle/arc smoothly. |
| Coincident | Two points become one, or a point lies on a curve. |
| Midpoint | A point sits at the middle of a line. |
| Concentric | Circles/arcs share a centre. |
| Horizontal / Vertical | A line or two points line up with the sketch axes. |
| Equal | Same length or same radius. |
| Symmetry | Two points mirror each other about a line. |
| Disconnect | Splits joined points apart. |
| Lock | Fixes a point in place. |
| Make Construction | Turns the selection into construction geometry. |
| Hide Constraints | Hides the constraint glyphs for a cleaner view. |
Dimensions
Dimensions for length, distance, radius and angle appear as labels. Tap a label to type a new value — the sketch re-solves. The panel at the bottom shows the selected dimension (e.g. Length 35 mm) with − / + steppers, and the degrees of freedom left: 0 means fully defined.
Finishing
- Extrude / Revolve buttons at the bottom turn the closed profiles straight into a solid.
- Done (Finish Sketch) keeps the sketch as an item for later use.
- Esc ends a line, then deselects, then leaves the sketch.
MCP twins: sketch_extrude, sketch_revolve.
6. Insert
| Tool | What it does / how to use |
|---|---|
| Create Variable (⇧⌘V) | Opens the variables panel. Name a value (width = 40) and use it in any field. See §12. |
| Image | Places a reference image (blueprint, photo) on a plane or flat face, at real size, to trace over. |
| File (⇧⌘I) | Imports STEP, IGES, STL or BREP as new bodies. |
| Project (⇧⌘P) | Imports the bodies of another Sculpt3D project. |
| Coil Spring | A round wire wound along a helix (springs, coils). |
| Box, Cylinder, Sphere, Cone, Torus | Adds a primitive at the origin; set its sizes in the panel. |
| Terrain ▸ Rolling Hills / From Height Map… | A landscape solid from noise, or from a greyscale image (white = high). |
| Import Material… / Import Image as Decal… | Bring in a material or a decal image. |
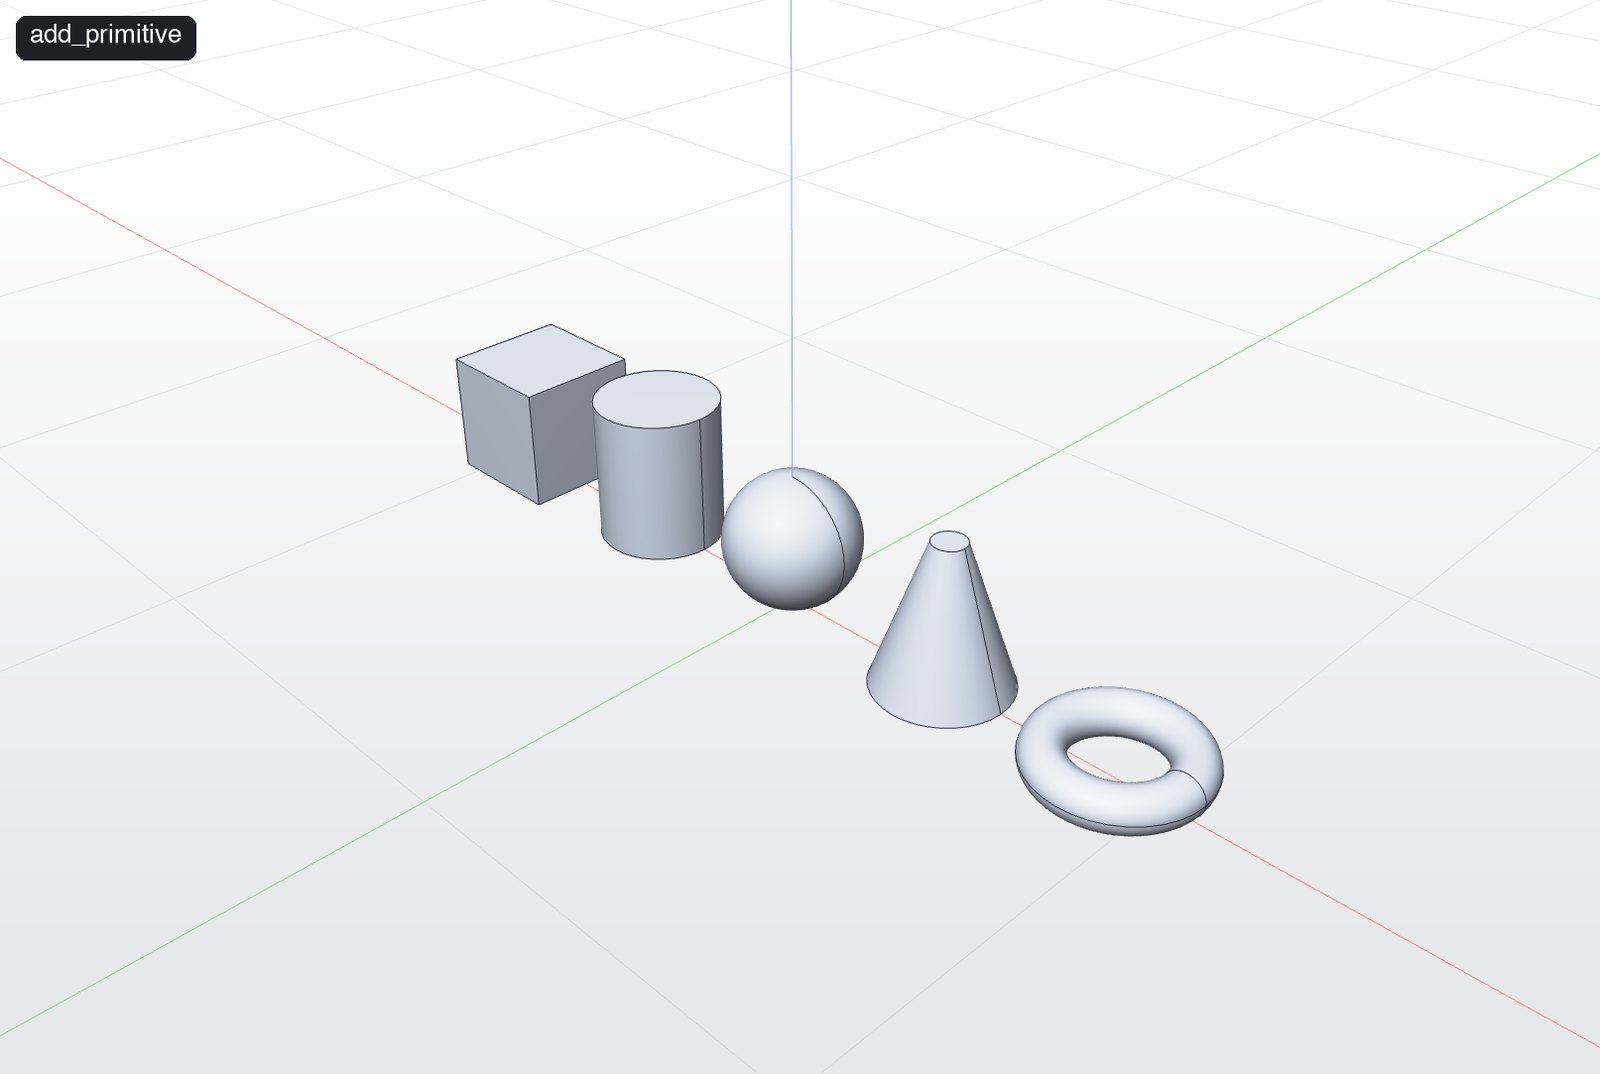
Primitive defaults: Box 40×40×40 · Cylinder r20 h40 · Sphere r20 · Cone r20/5 h40 · Torus 25/8.
MCP twins: add_primitive, import_file, create_terrain.
7. Construct
Construction planes and axes are references you sketch on, mirror across, or rotate around. They appear in Items.
| Tool | How to use |
|---|---|
| Plane | Offset from a selected face, a plane, or Top. Set the offset distance. |
| Angled Plane | Turned about the base plane's X axis by an angle. |
| Midplane | Select two flat faces: the plane lies halfway between them. |
| Plane Through 3 Points, on Curve at Point, Perpendicular to Edge at Point, Through Edge at Angle, Parallel to Face at Point | Construct menu variants for exact placement. |
| Axis | Through a round face, along an edge, or Z by default. |
| Axis Through 2 Points / 2 Planes / of Cylinder/Cone / Along Edge / Perpendicular to Face at Point | Construct menu variants. |
8. Transform
Select a body (double-click) first. All transforms are history steps.
| Tool | Key | How to use | MCP twin |
|---|---|---|---|
| Move/Rotate | M | Drag the gizmo arrows to move, rings to rotate; or type values. | transform_body |
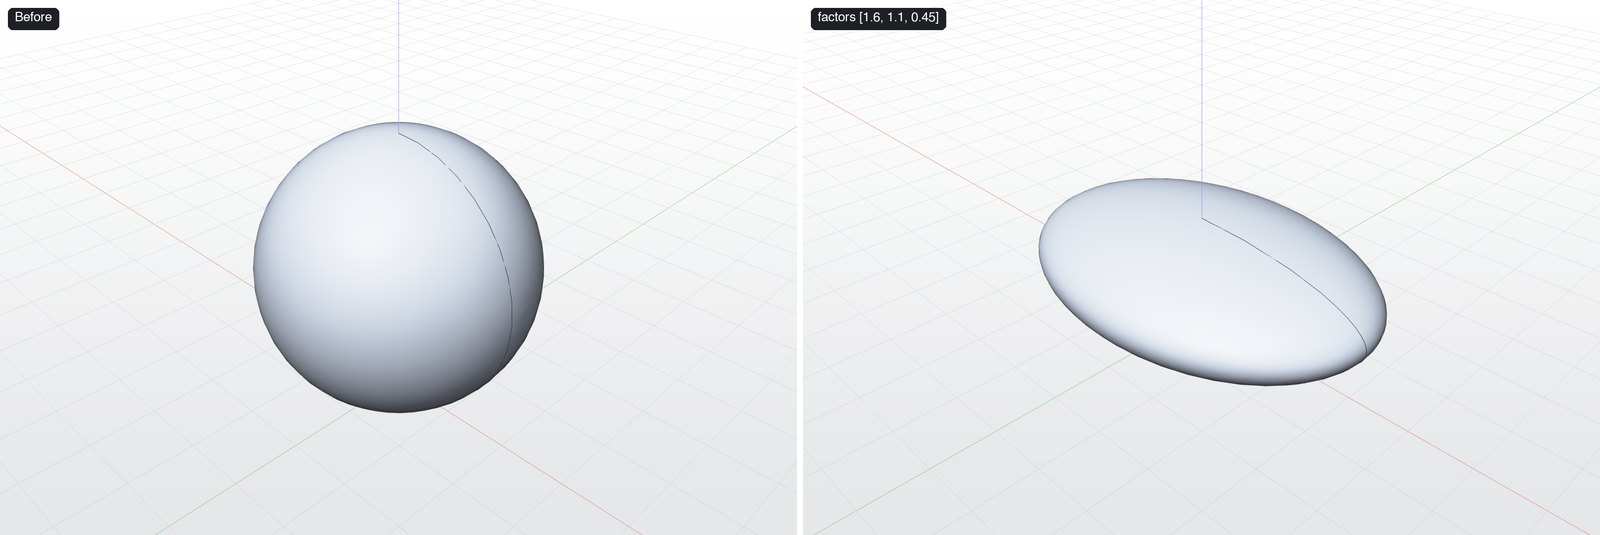
| Scale | — | Uniform factor, or per-axis X/Y/Z factors. | scale_body |
| Translate | N | Move along an axis by an exact distance. | transform_body |
| Pattern | — | Linear copies: count, spacing, direction. | pattern_body |
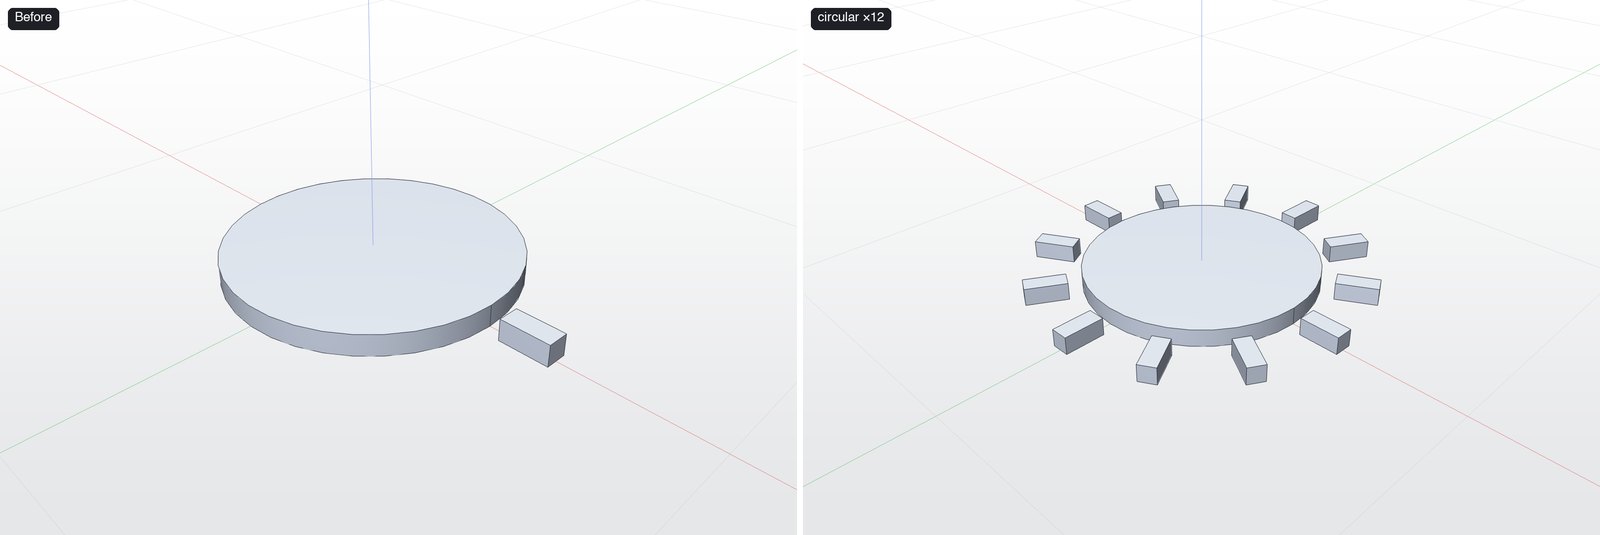
| Circular Pattern | — | Copies around an axis: count and total angle. | pattern_body |
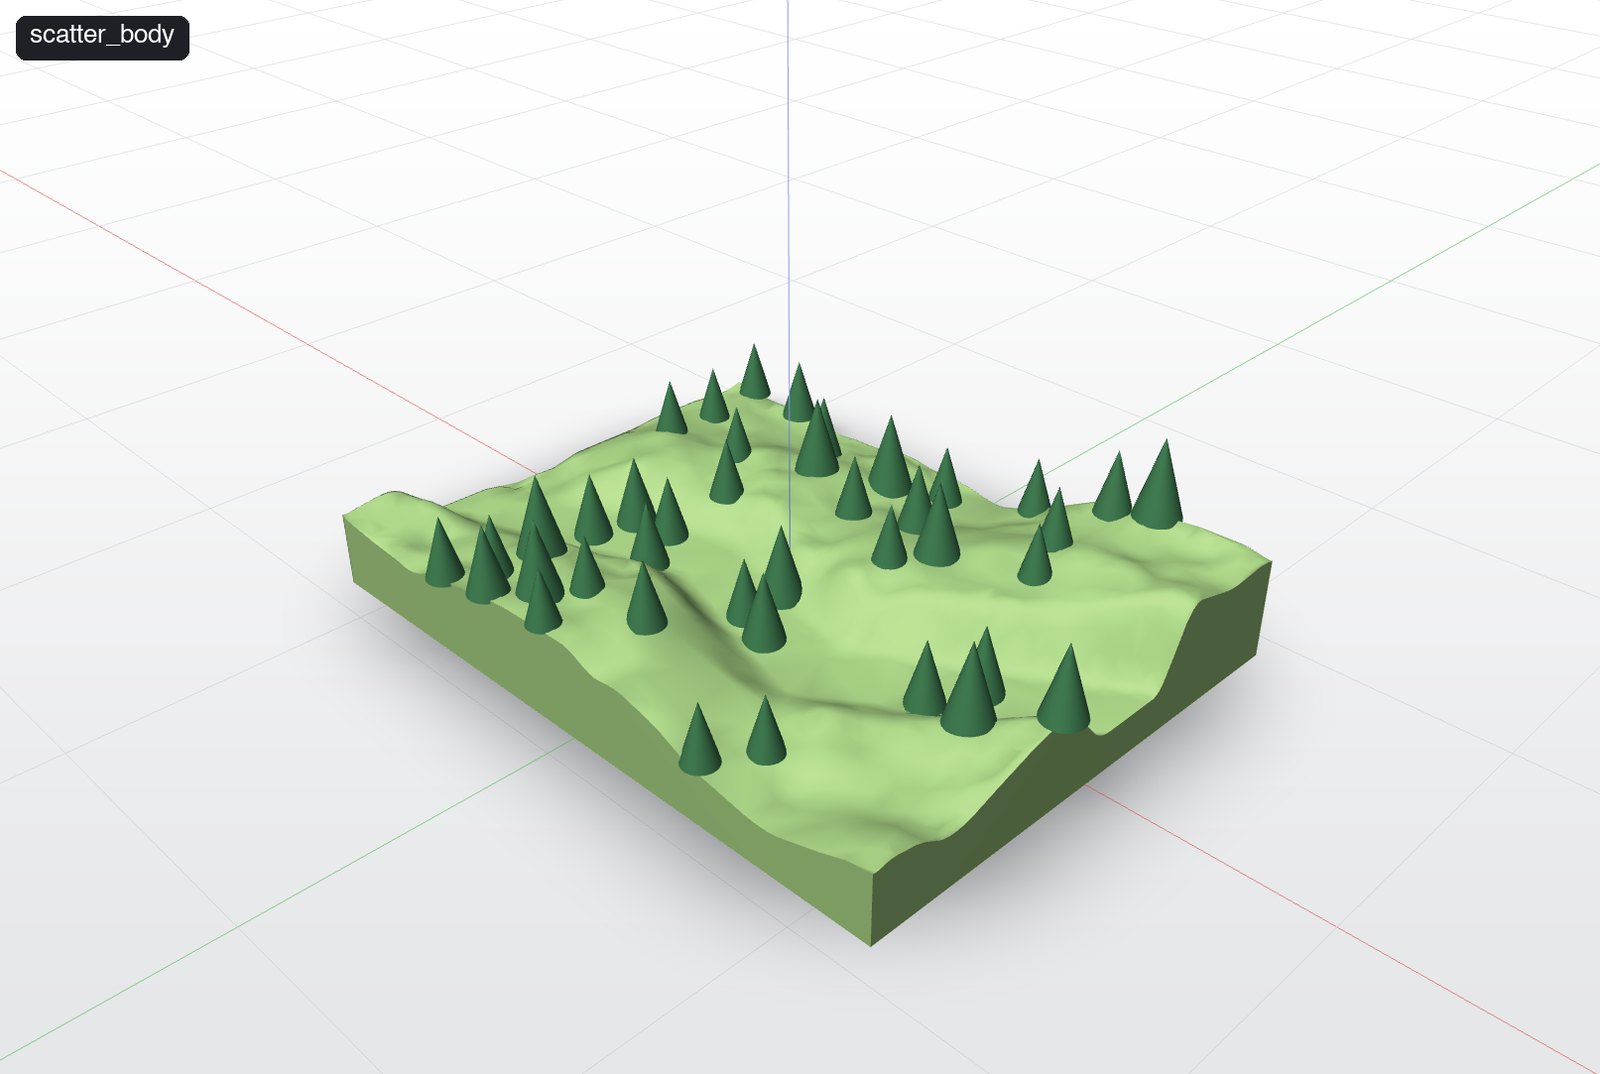
| Scatter | — | Select the body to scatter, then the ground. Random copies over the surface. | scatter_body |
| Rotate Around Axis | — | Uses a selected axis, or vertical. | transform_body |
| Align | — | Select the body to move, then the target. Line up min/centre/max per axis. | — |
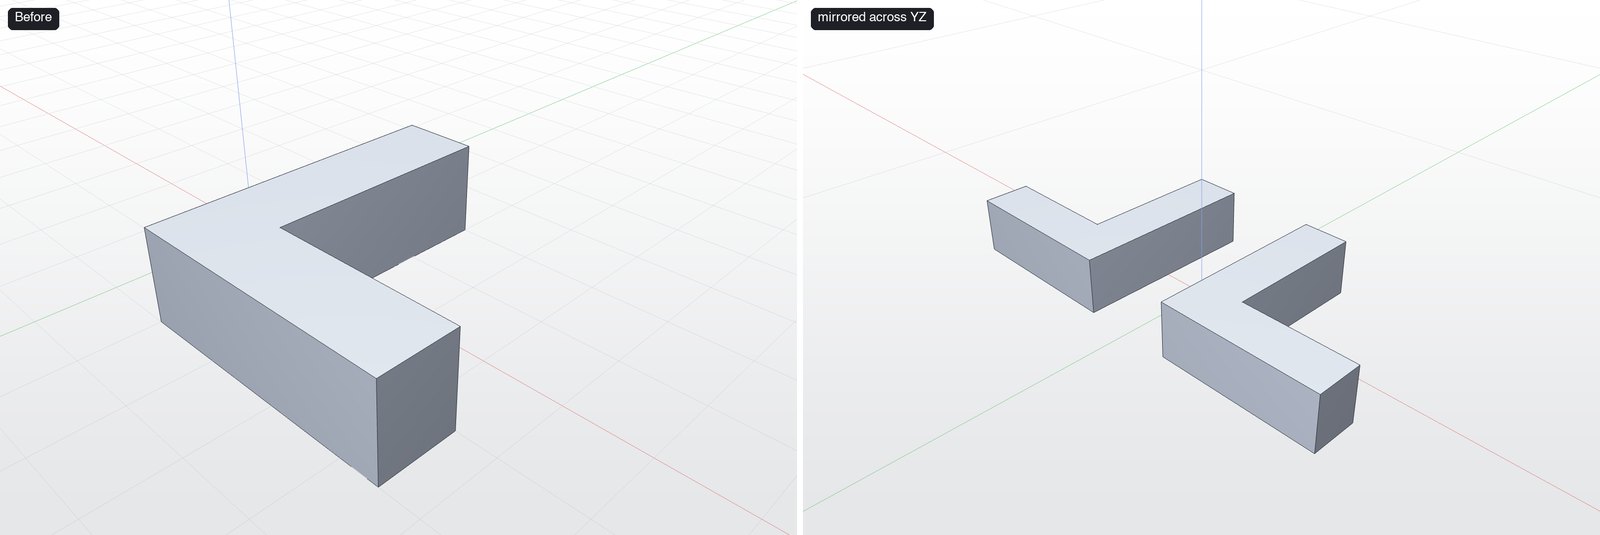
| Mirror | — | Mirror across XY, XZ, YZ or a plane; keep or replace the original. | mirror_body |
| Duplicate | ⌘D | Copy in place as a new body. | duplicate_body |
Move / Rotate
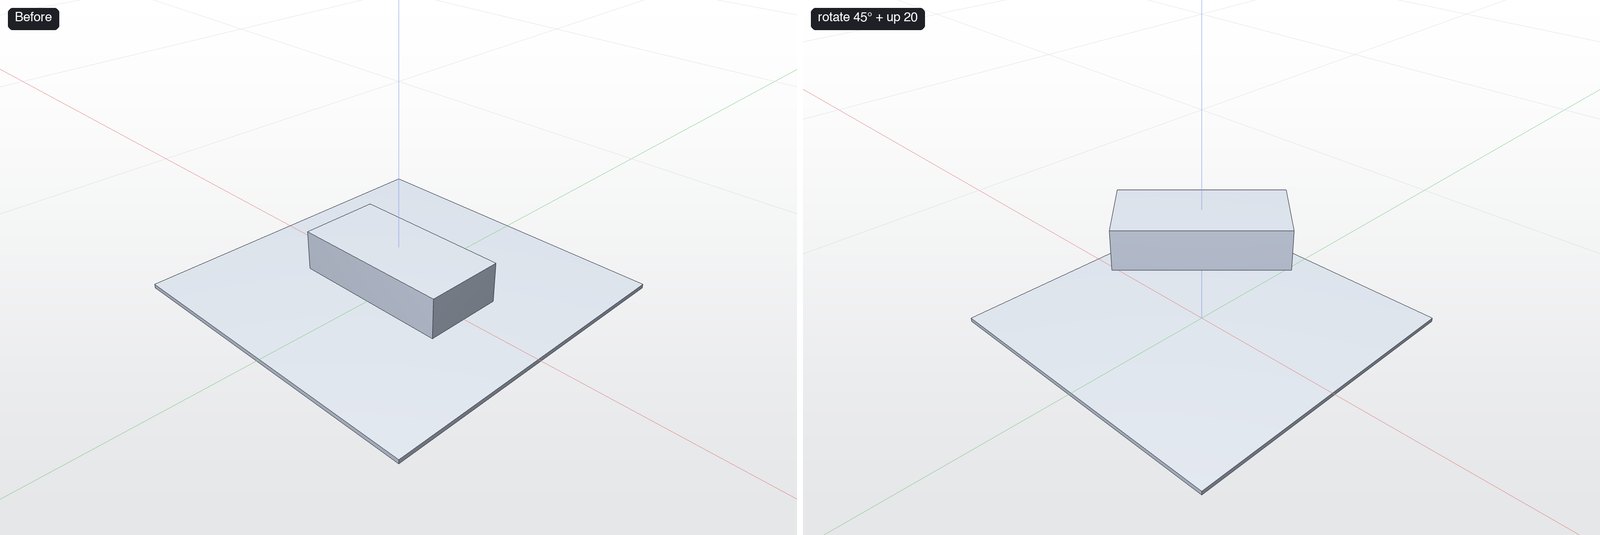
Circular Pattern
Mirror
Scale (non-uniform)
Scatter
9. Tools (solid modeling)
| Tool | Key | Select first | What it does | MCP twin |
|---|---|---|---|---|
| Extrude | E | A sketch in Items, or a flat face | Pushes a profile into a solid: new body, join or cut. | sketch_extrude |
| Revolve | V | A sketch in Items | Spins a profile around an axis. | sketch_revolve |
| Loft | — | 2+ sketches, in order | Smooth solid through cross-sections. | loft |
| Sweep | W | Profile, then path sketch | Pushes a profile along a path. | (in development) |
| Pipe | — | A path sketch | Round tube along a path. | (in development) |
| Union | ⌘U | Two bodies | Joins them. | boolean |
| Subtract | ⌘B | Two bodies (keep, then tool) | Cuts the second from the first. | boolean |
| Intersect | ⌘I | Two bodies | Keeps only the overlap. | boolean |
| Fillet | F | Edges | Rounds edges by a radius. | fillet_edges |
| Chamfer | — | Edges | Bevels edges by a distance. | chamfer_edges |
| Shell | H | A body, or faces to open | Hollows to a wall thickness. | shell_body |
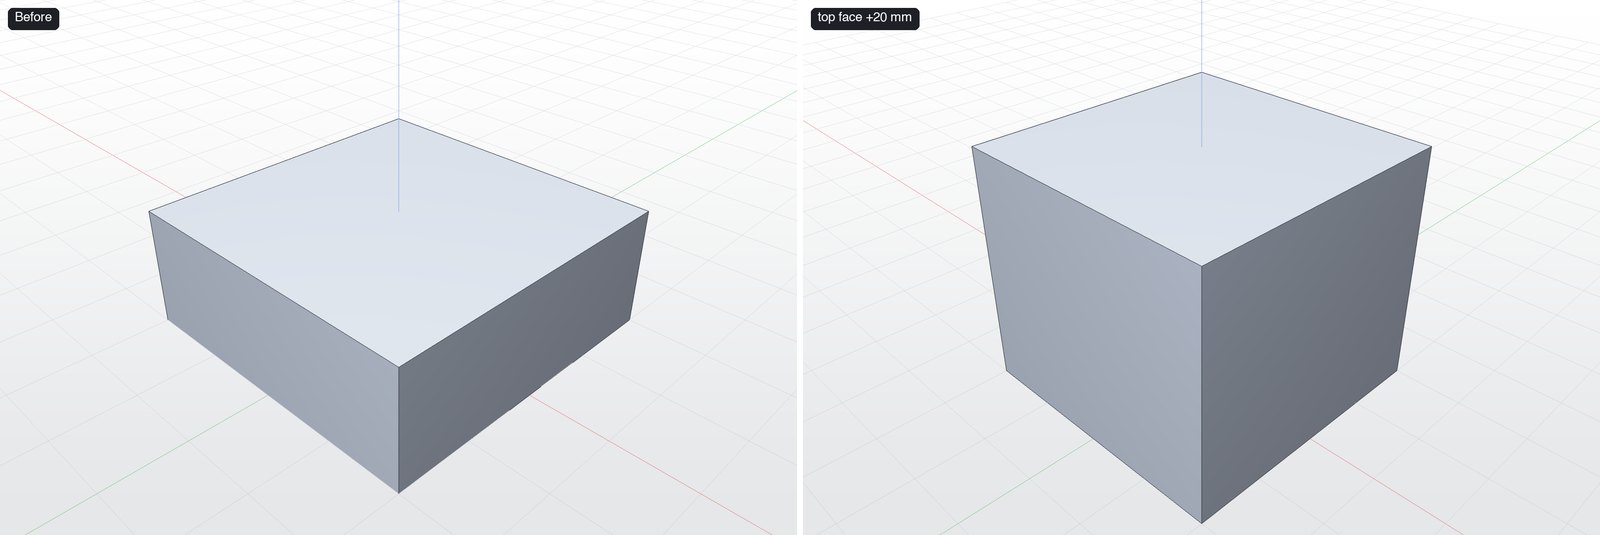
| Push/Pull | — | One flat face | Moves a face along its normal (+ adds, − removes). | push_pull_face |
| Offset Face | — | Faces | Moves faces (flat or curved) in/out. | (in development) |
| Split Body | — | A body | Cuts it in two along a plane. | (in development) |
| Thicken | — | One face | Gives a face a thickness as a solid. | (in development) |
| Fill | — | A closed loop of edges | Closes an opening with a new face. | (in development) |
| Replace Face | — | Face to move, then target face | Brings one face onto another surface. | (in development) |
| Project as Edge | — | A body | Projects its outline onto a plane or face. | (in development) |
| Draft | — | Side faces | Tilts faces for mould release. | (in development) |
| Delete Faces | — | Faces | Removes faces and heals the body. | (in development) |
| Wrap & Emboss | — | Sketch + body | Raises or sinks lettering/logos on a surface. | (in development) |
| Delete Body | ⌘⌫ | Bodies | Removes bodies (as an undoable step). | delete_body |
"In development" means the in-app tool exists but its MCP version isn't in the shipped build yet — see the MCP appendix.
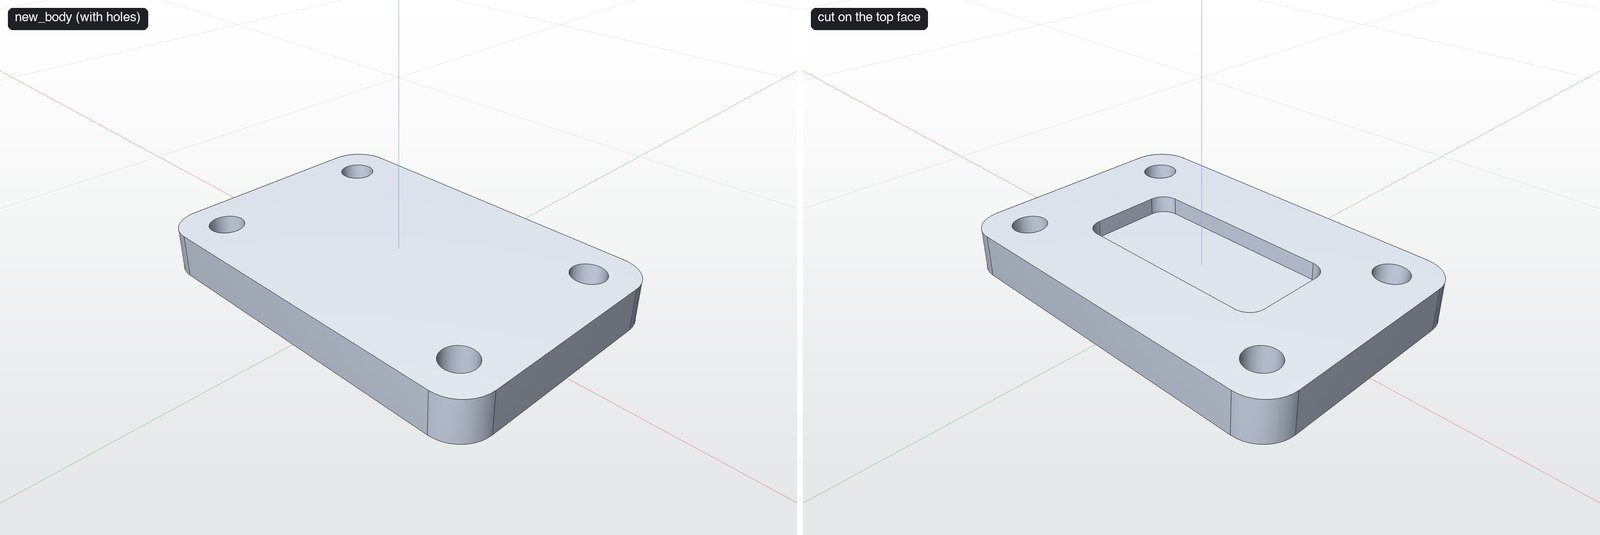
Extrude — step by step
- Draw a closed profile (§5) or select a flat face.
- Press E. The panel shows Distance and a mode: New body, Join or Cut.
- Drag the arrow or type a distance (negative goes the other way). Shapes inside shapes become holes.
- Done.
Revolve
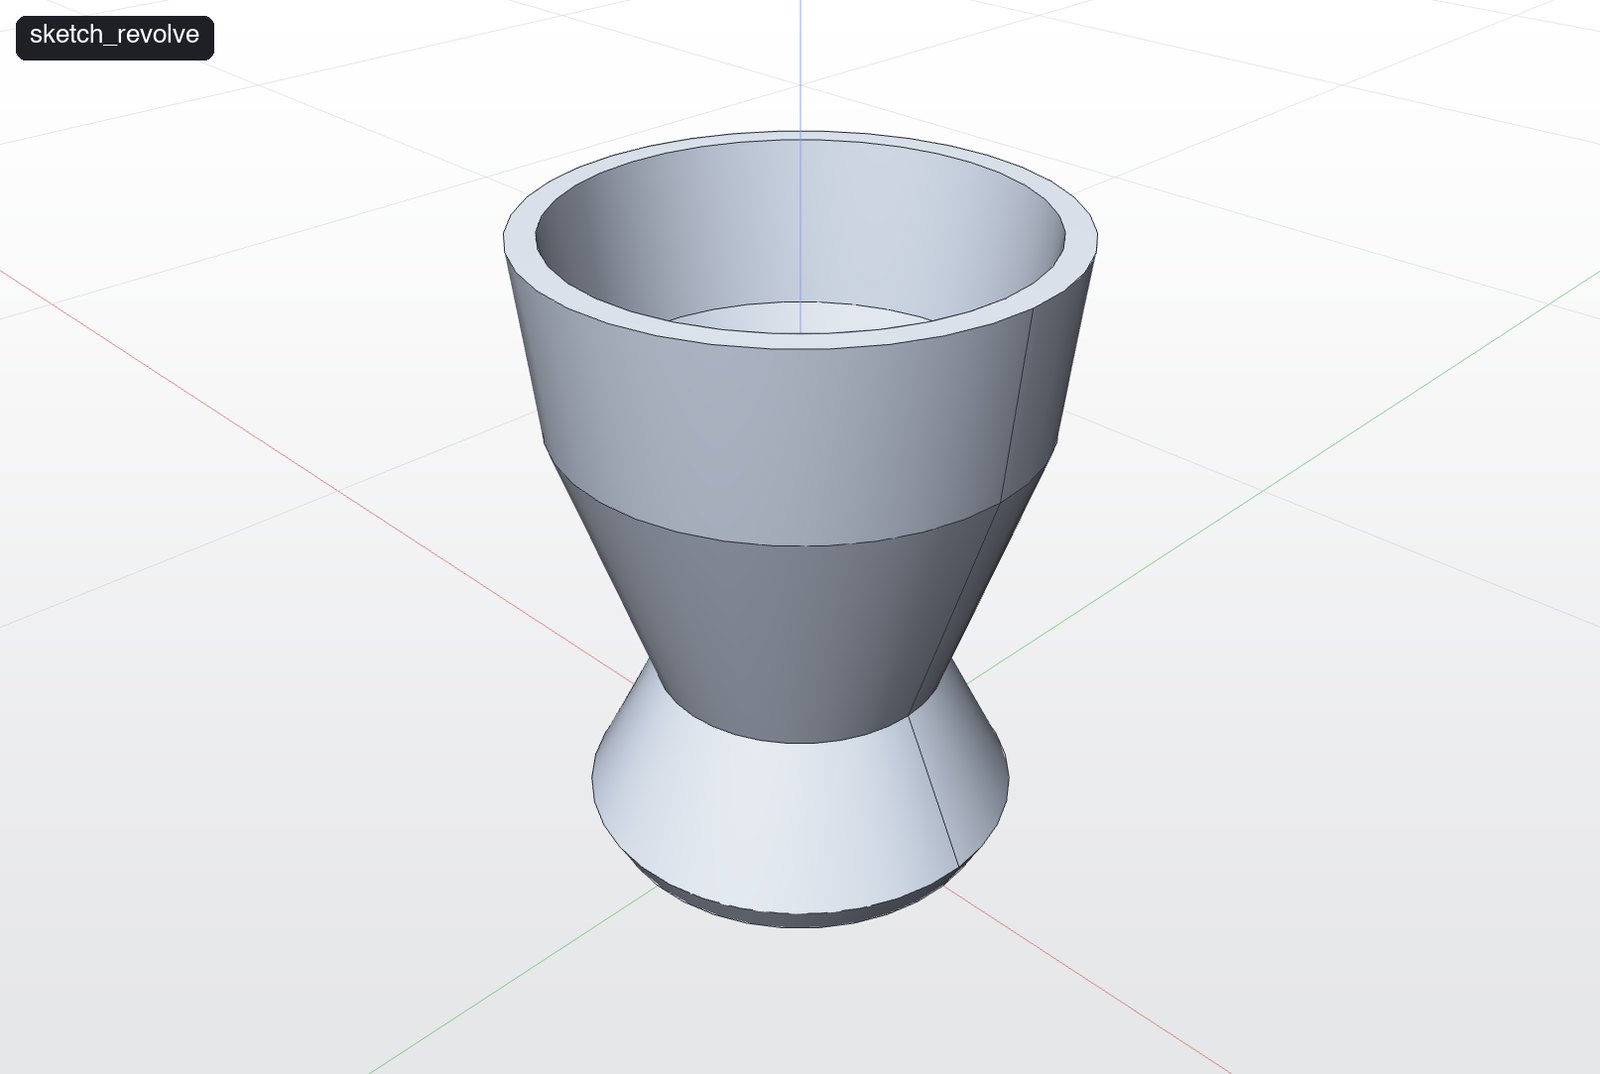
Draw a half-profile on one side of an axis, select the sketch, press V, pick the axis and angle (360° for a full turn). The profile must not cross the axis.
Loft
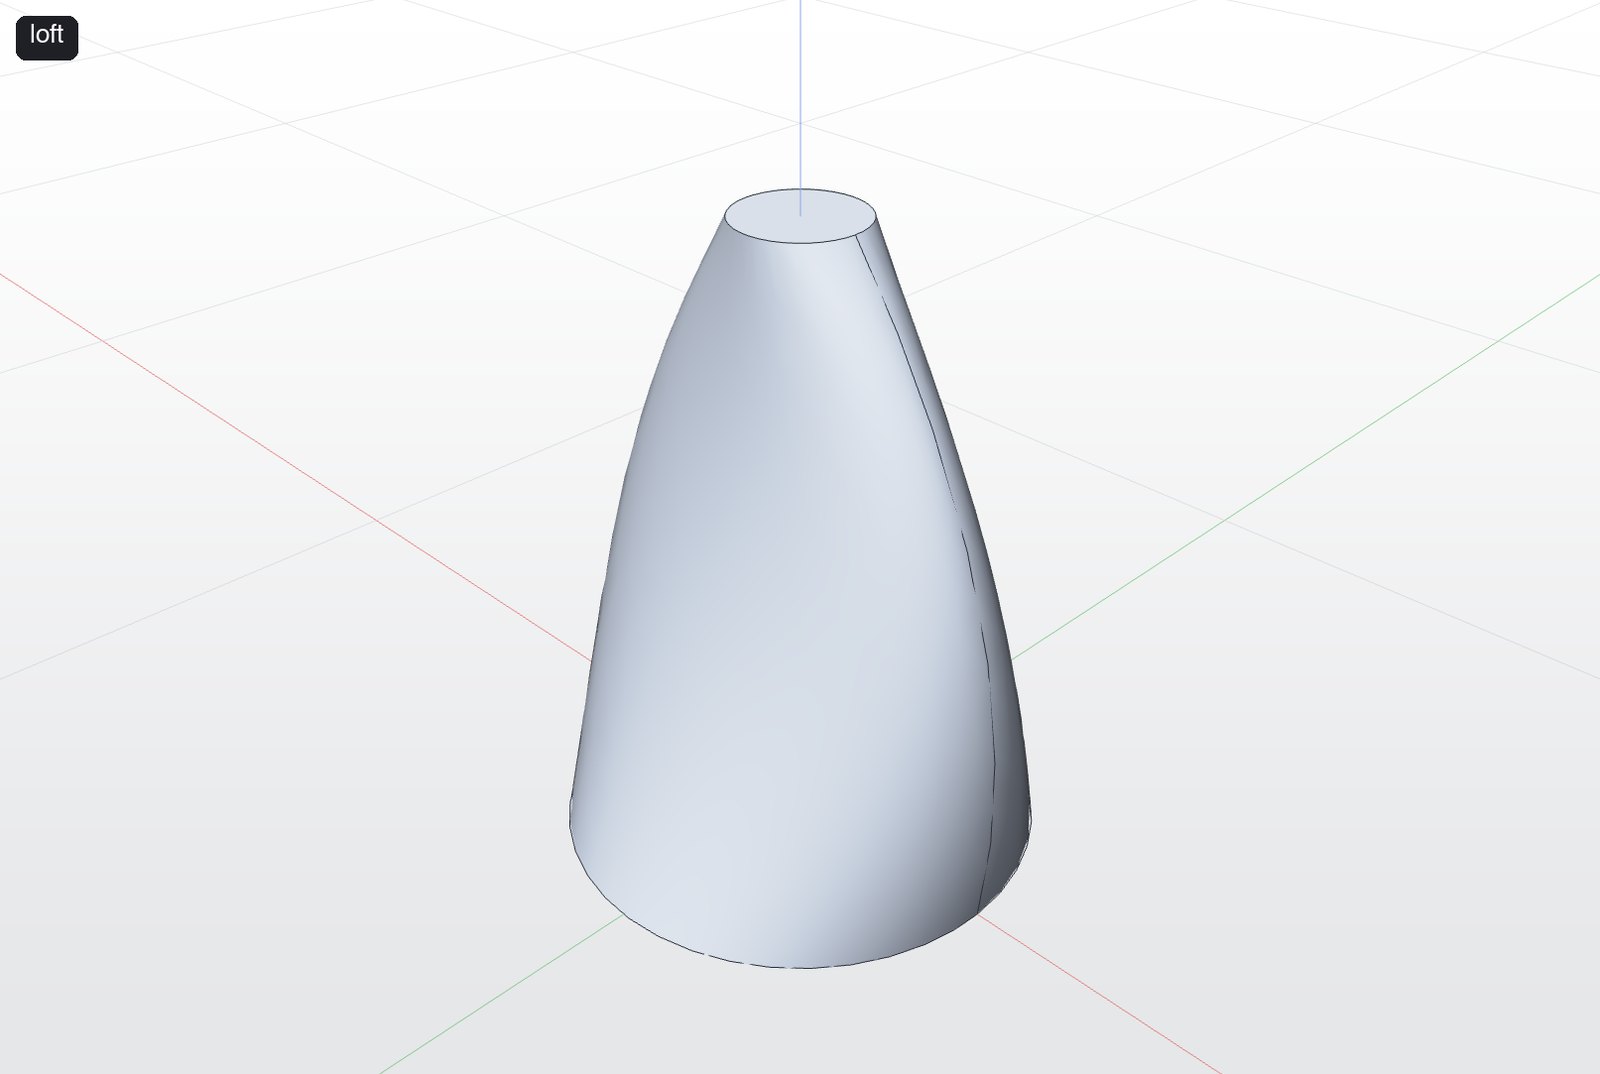
Draw one closed shape on each of several planes (e.g. offset planes), select the sketches in order, then run Loft. Start sections at matching points so the surface doesn't twist.
Union / Subtract / Intersect
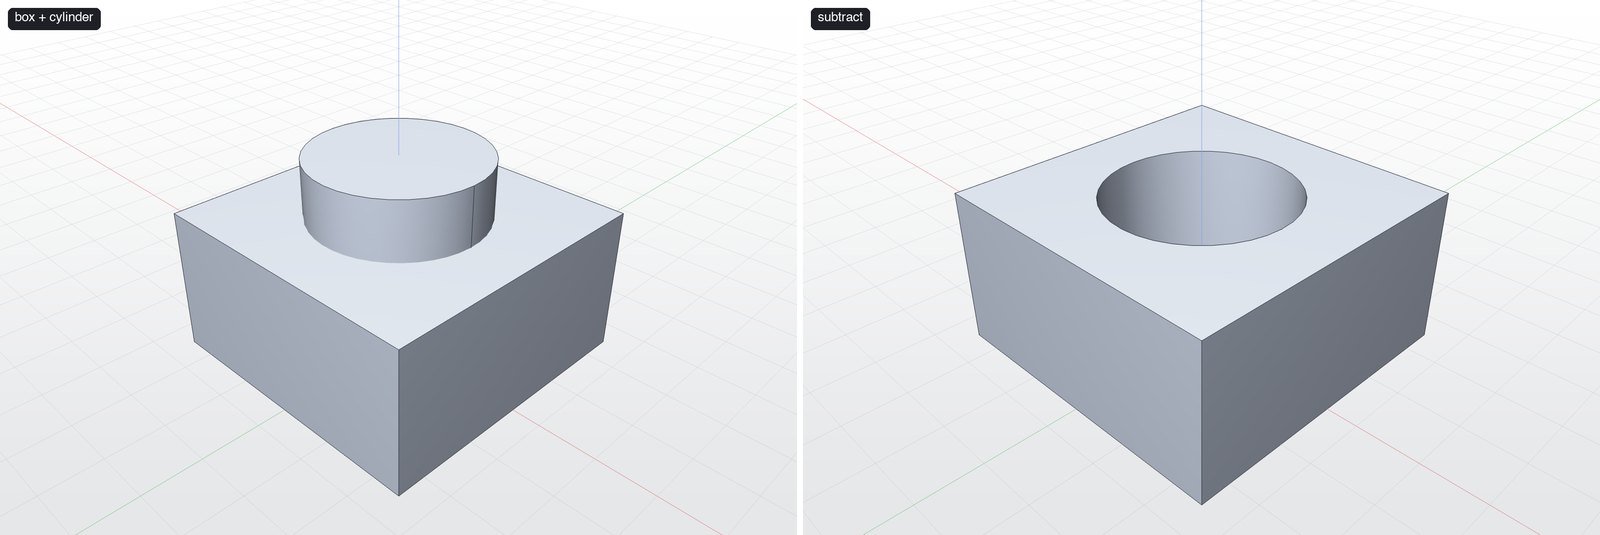
Double-click the body to keep, ⇧-double-click the tool body, then ⌘U / ⌘B / ⌘I.
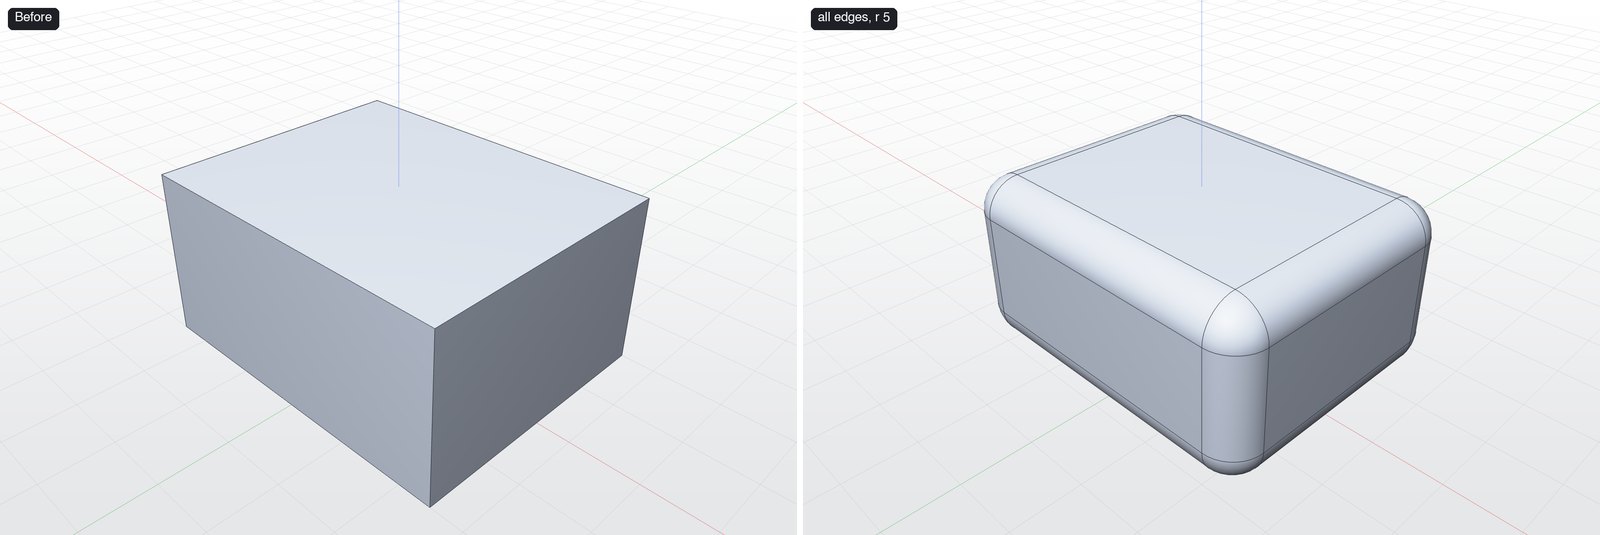
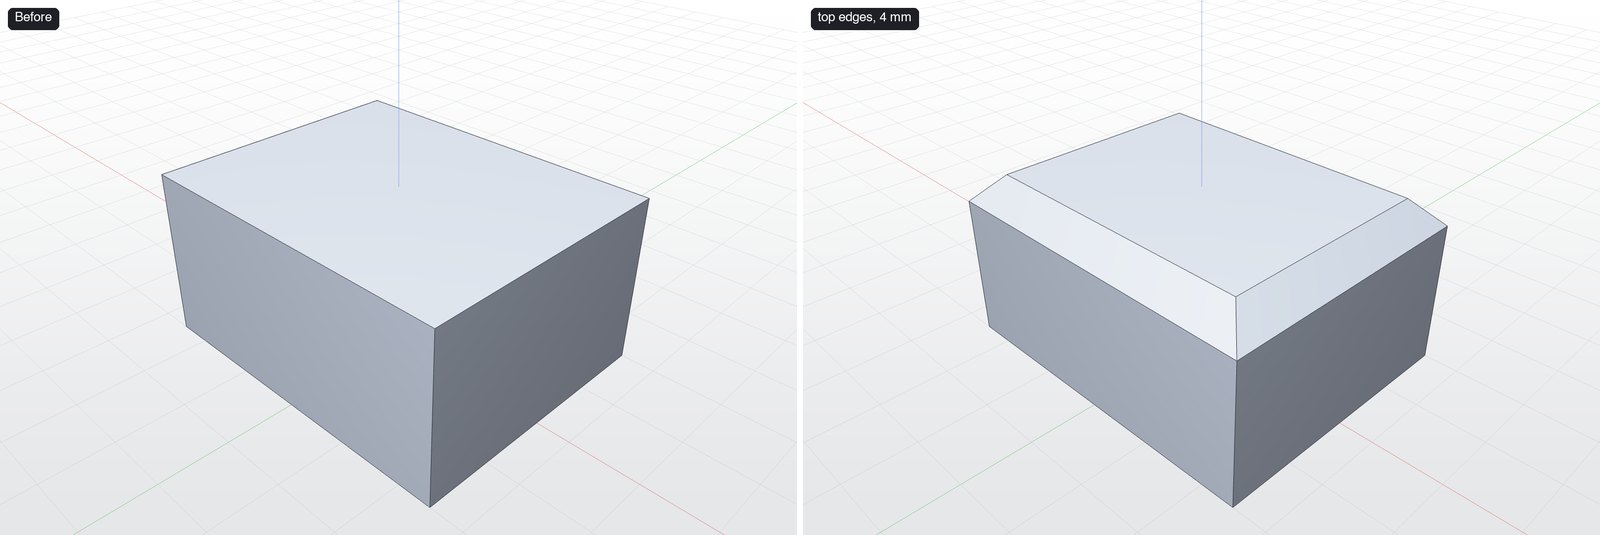
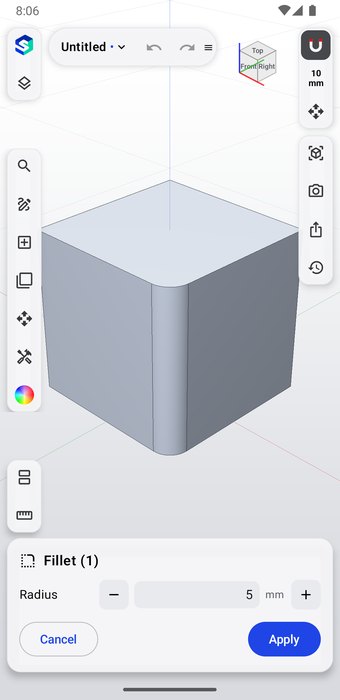
Fillet and Chamfer
Click edges (⇧-click to add more), press F for Fillet (or run Chamfer), type the radius/distance.
Shell
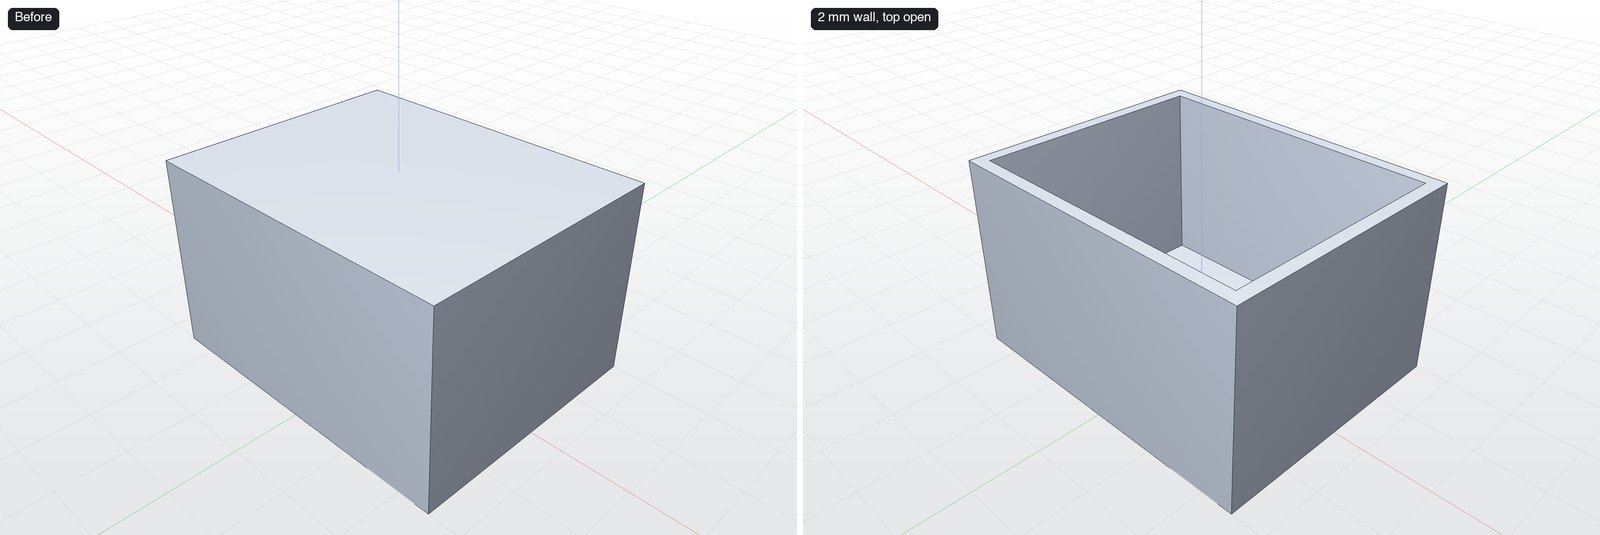
Select the body (or the faces to leave open), press H, set the wall thickness.
Push/Pull
Click one flat face, run Push/Pull, drag or type the distance.
10. View, Measure and Section
Camera views
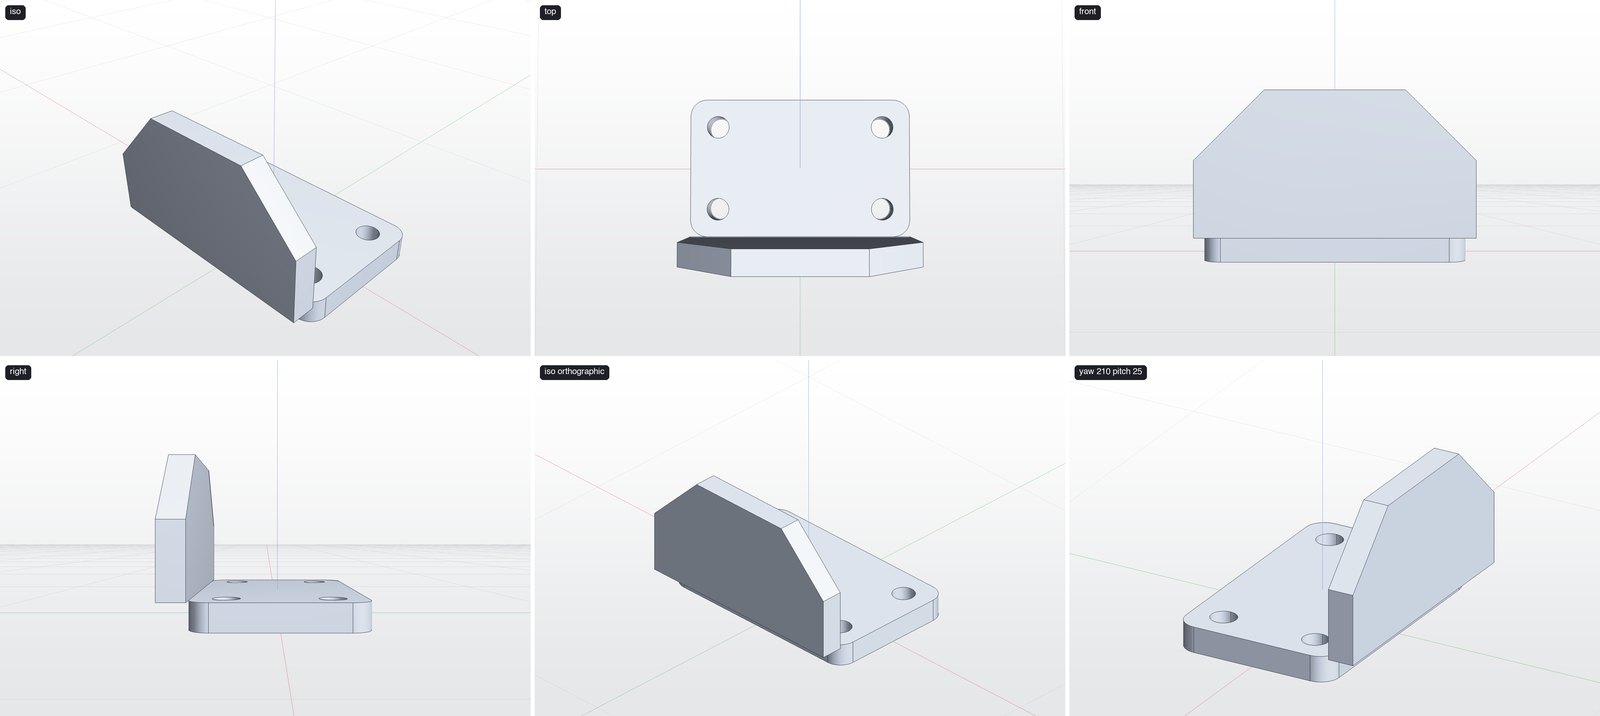
Zoom to Fit (⇧⌘F), Isometric, Top, Front, Right views, perspective or orthographic projection (Camera menu), or click a face of the view cube.
Display modes
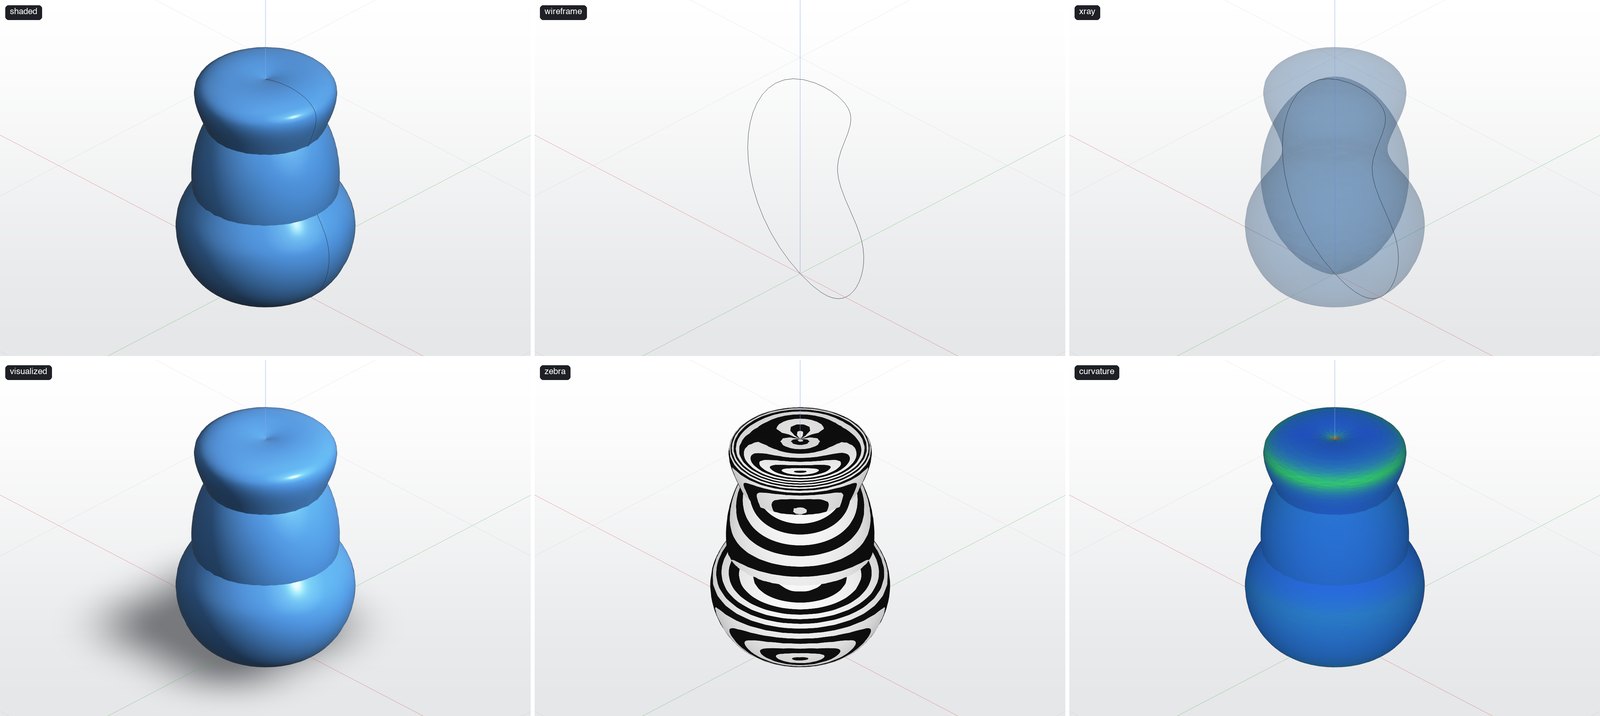
Right rail ▸ Display Modes: Shaded, Wireframe, X-Ray, Visualized, Zebra Analysis (reflection stripes, to check surface smoothness) and Curvature Map.
Measure (⌥⌘M)
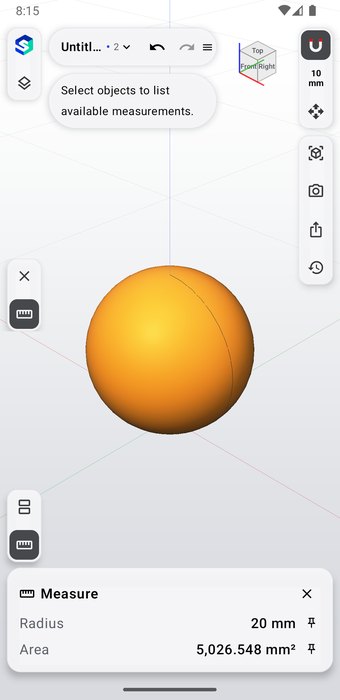
- Press Measure (bottom left) or ⌥⌘M. The rail switches to measure mode.
- Click one entity for its volume / area / length / radius, or two for the distance and angle between them. Deltas along X/Y/Z are shown too.
- Pin a measurement to keep it on screen. Point-to-Point Distance measures between two picked points. Clear Measurements removes pins.
- Exit Measure (✕) returns to modeling.
MCP twin: measure.
Section View (⌥⌘S)
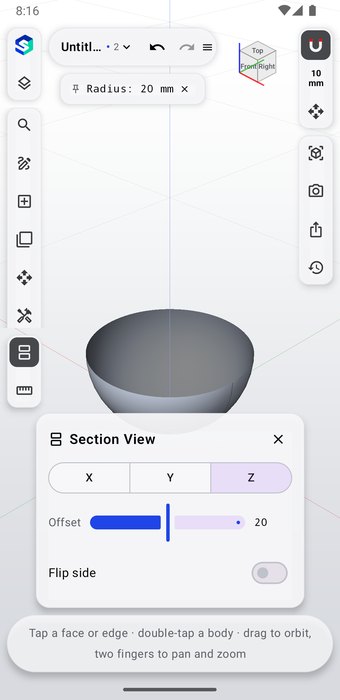
Cuts the model open along a plane so you can see inside. Drag the section plane or edit it (View ▸ Edit Section View). 2D Section View looks straight at the cut.
Screenshot
Right rail ▸ Screenshot saves the viewport as a PNG. Visualize offers a 4× capture.
11. Visualize
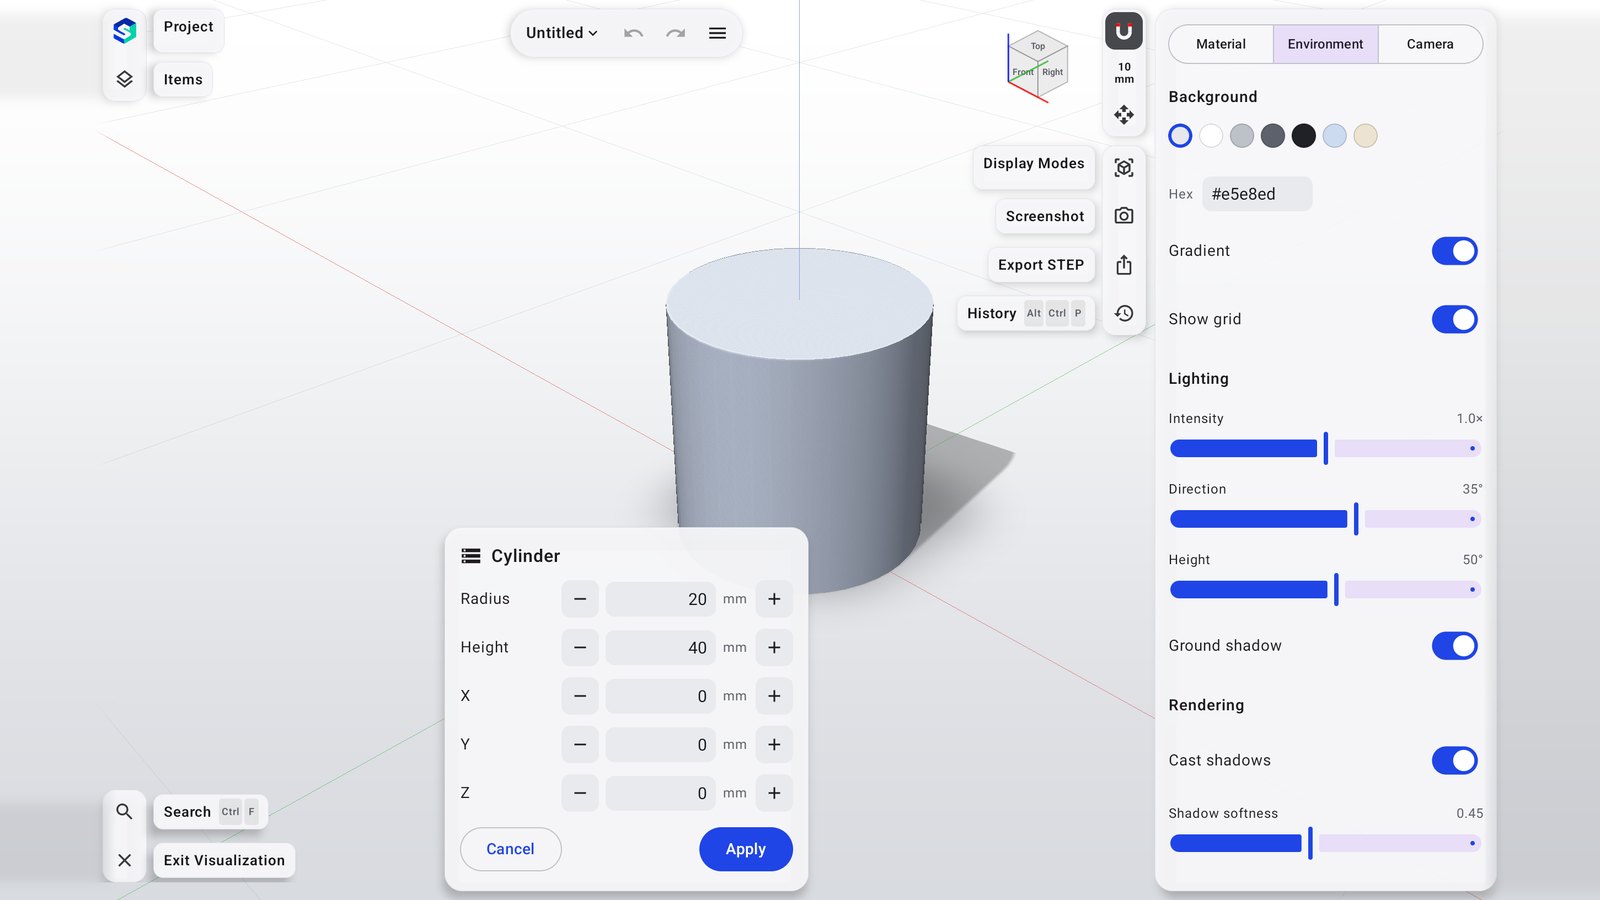
Open with the colour-wheel Visualize icon (or File ▸ Open Visualization…).
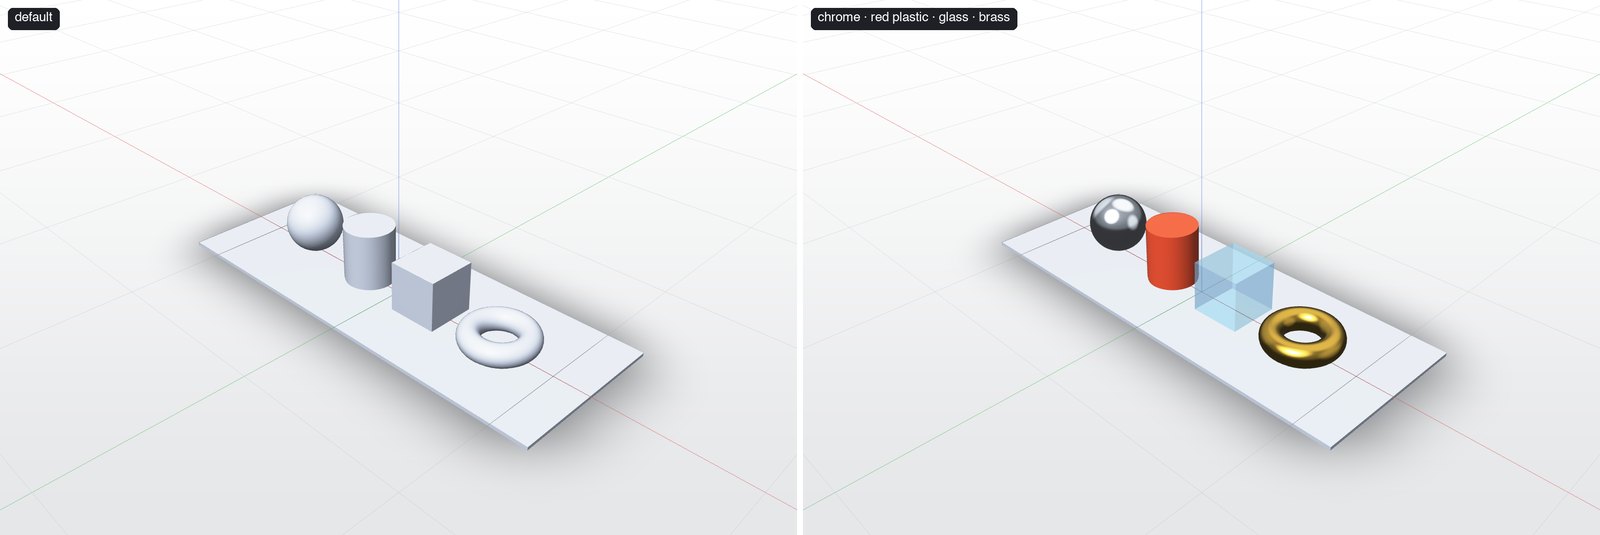
- Materials — library of plastics, metals, glass, rubber, ceramic and wood with physically based shading. Select a body and tap a material; adjust colour, metallic, roughness, opacity.
- Environment — background colour/gradient, light direction and intensity, ground shadow, cast shadows, ambient occlusion.
- Camera — perspective or orthographic, field of view.
- Capture — 4× resolution render.
- Exit Visualization (✕) returns to modeling.
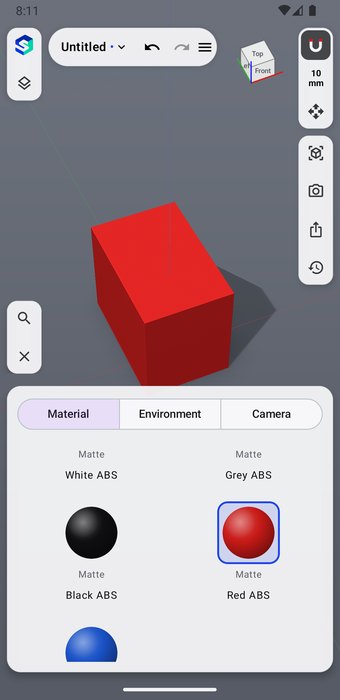
Materials (default → chrome, red plastic, glass, brass)
Environment (default → dark background, cast shadows, ambient occlusion)
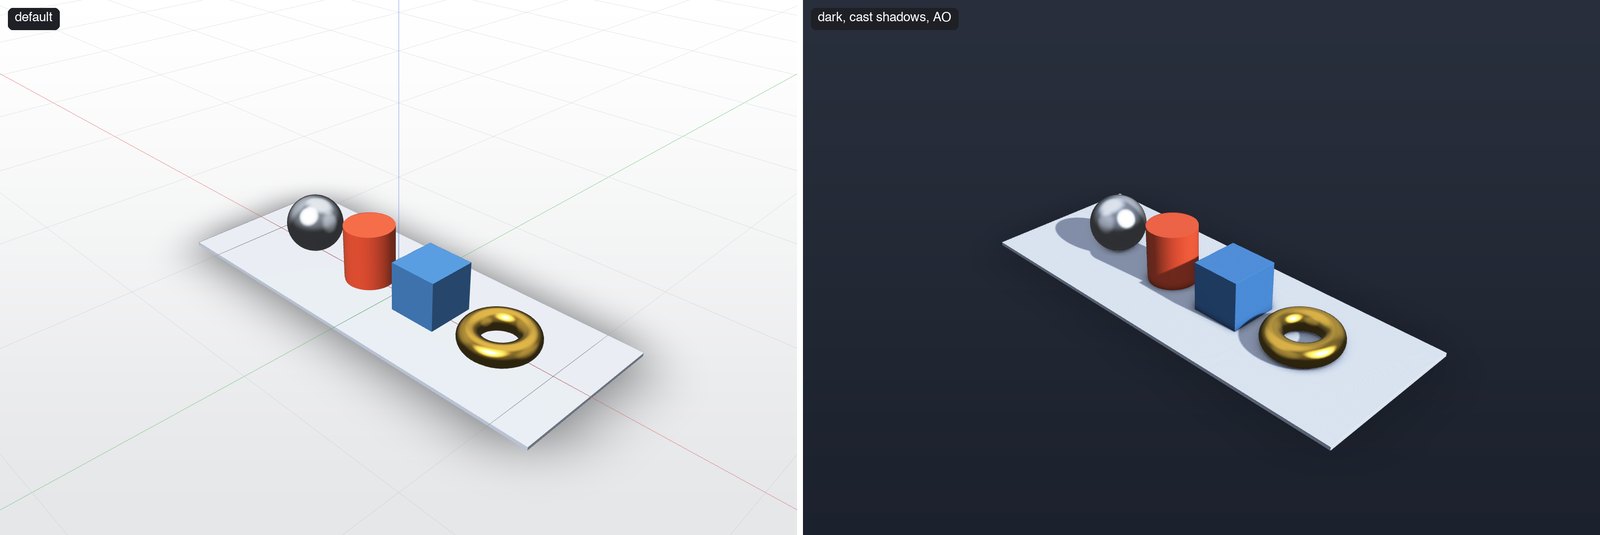
MCP twins: set_appearance, set_environment.
12. History, variables and undo
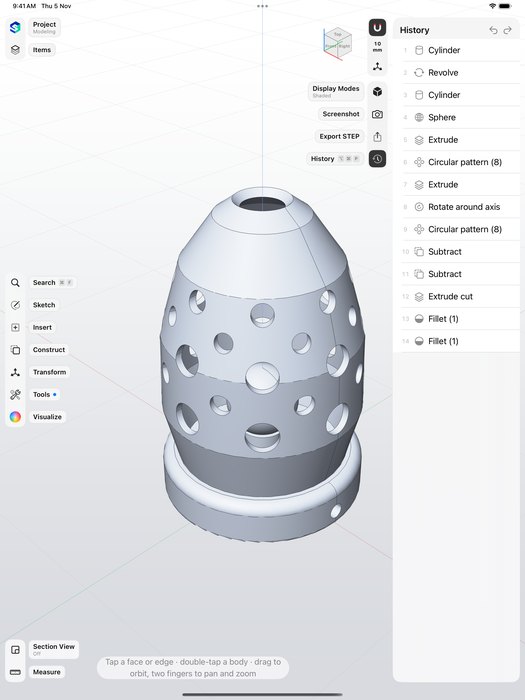
Open History with ⌥⌘P (right rail). Every step is replayed from the document, so you can:
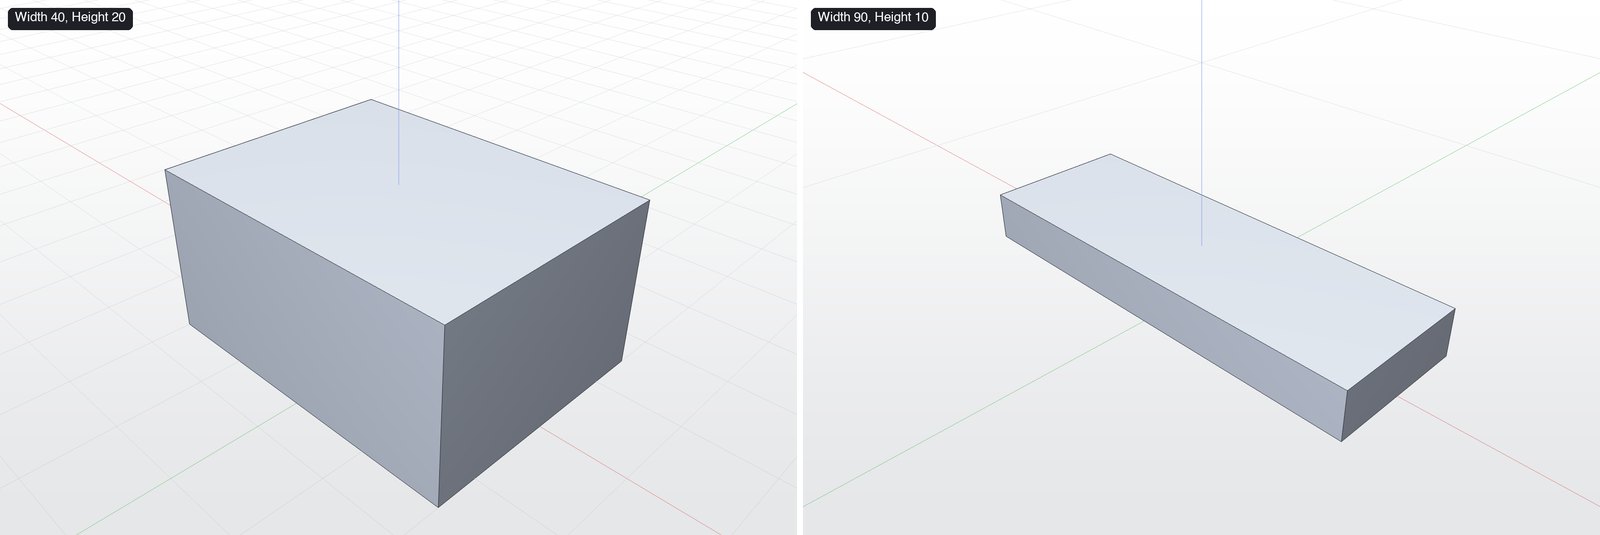
- Edit — tap a step, change its values; everything after it rebuilds.
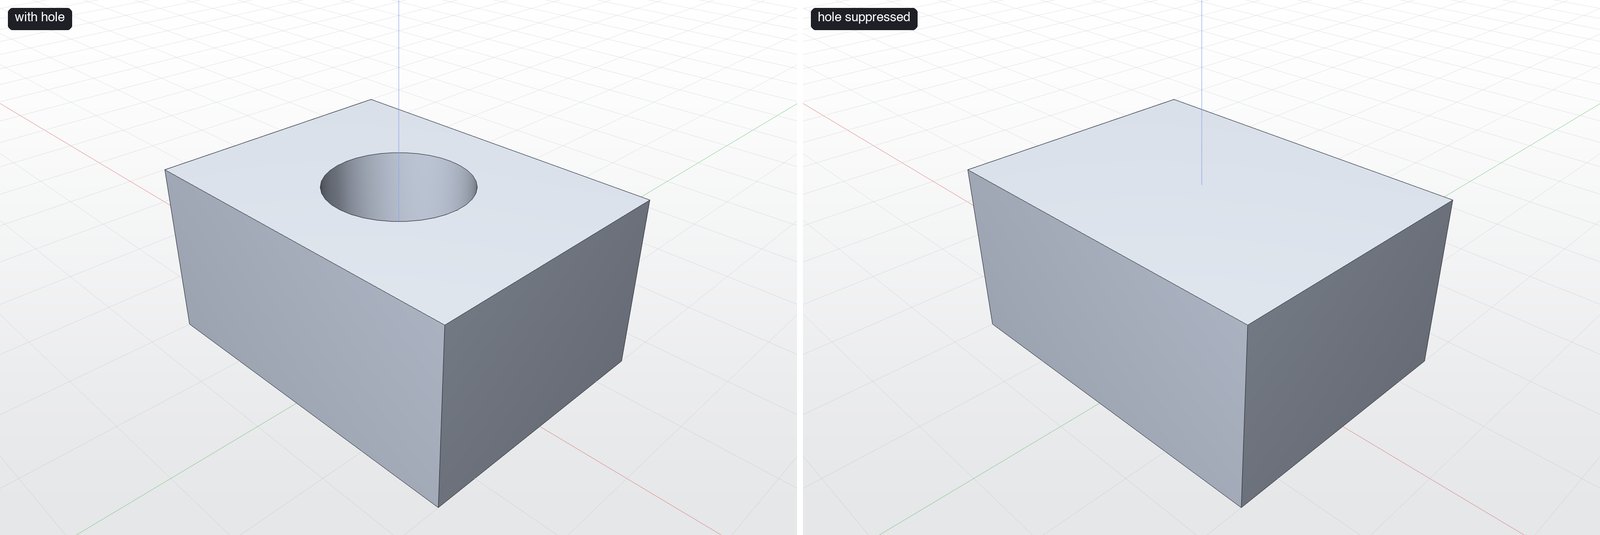
- Suppress — switch a step off without deleting it (e.g. to see the part without a hole).
- Delete — remove the step.
- Rename — give steps readable names ("Base plate", "Mounting holes").
Editing a step (Box width 40 → 90)
Suppressing a step
Variables
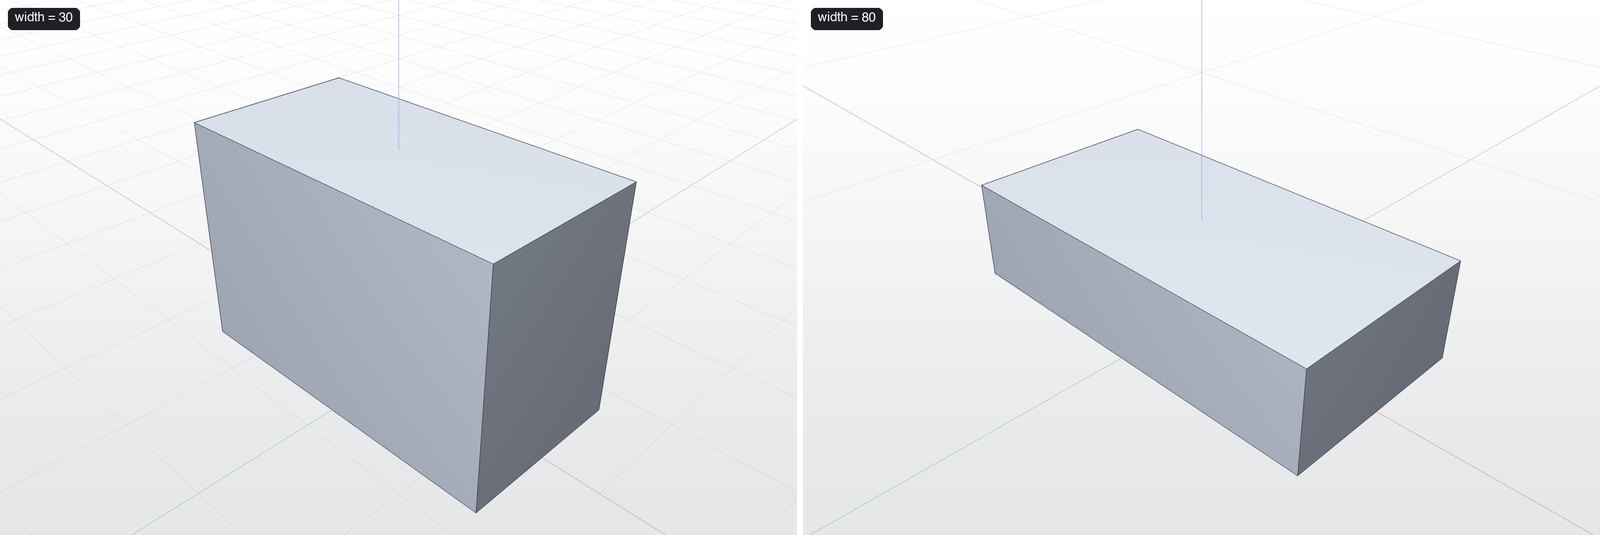
Insert ▸ Create Variable (⇧⌘V). Define width = 30, then type width or width / 2 in any field. Change the variable and every bound value updates.
Undo / Redo
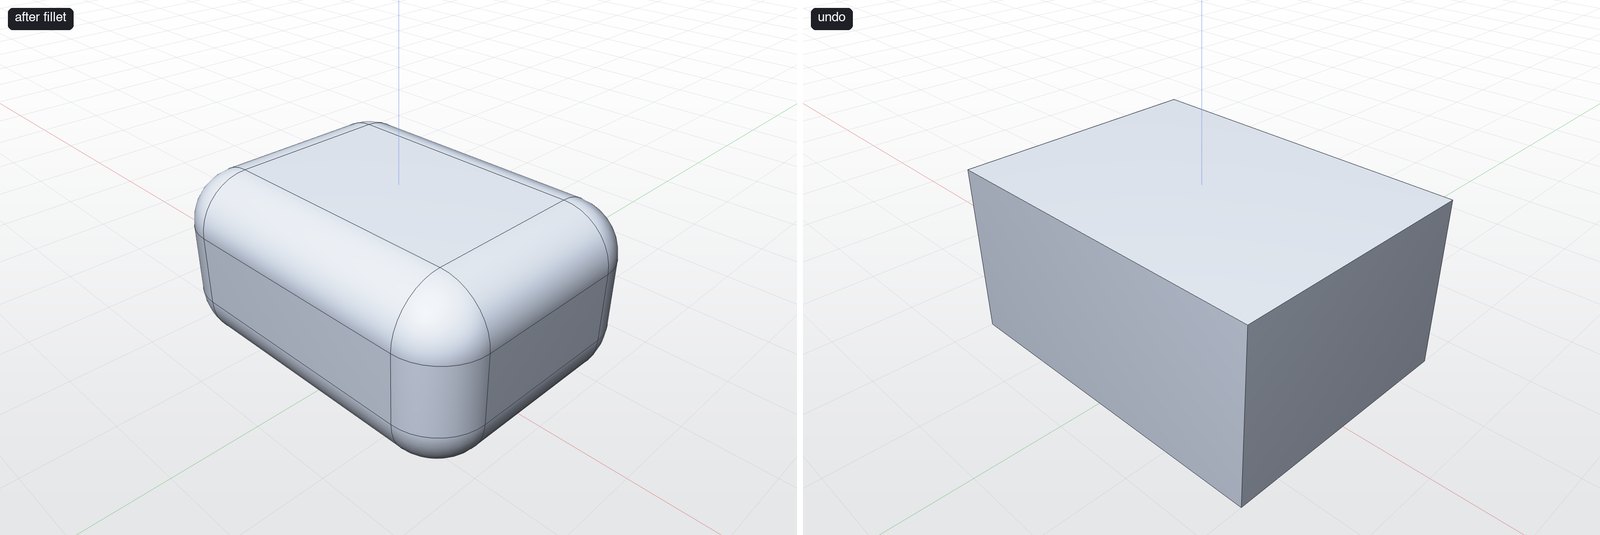
Top bar arrows, or ⌘Z / ⇧⌘Z. Undo also works inside a sketch.
MCP twins: update_feature, suppress_feature, delete_feature, set_variable, undo.
13. Export
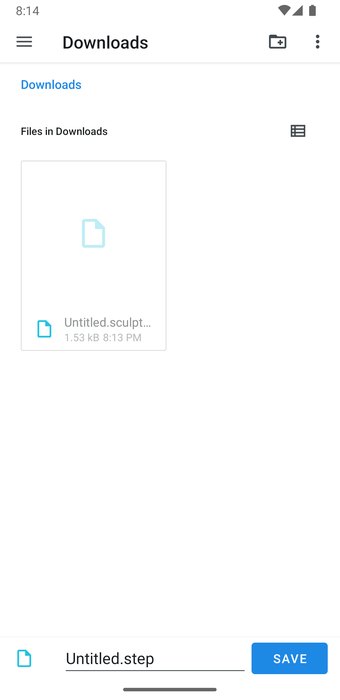
- Right rail ▸ Export STEP for a one-click STEP.
- File ▸ Export… for all formats: STEP, IGES, STL, BREP (precise CAD), 3MF, GLB, OBJ, USDZ (meshes with colours), DXF, SVG, PDF (sketches and drawing sheets), and .sculpt3d (the whole document).
- File ▸ Export to Slicer… sends a print-ready mesh to your slicer.
- Quick Export to Favorite Formats writes your saved favourites at once.
- File ▸ New Drawing creates a 2D drawing sheet of the model.
- View in Browser / Copy Link / Share… / Publish Current Version… share a web viewer of the model.
MCP twin: export_model.
14. Keyboard shortcuts
Modeling
| Key | Tool | Key | Tool |
|---|---|---|---|
| E | Extrude | ⌘U | Union |
| V | Revolve | ⌘B | Subtract |
| W | Sweep | ⌘I | Intersect |
| F | Fillet | ⌘D | Duplicate |
| H | Shell | ⌘⌫ | Delete selection |
| M | Move/Rotate | ⌘Z / ⇧⌘Z | Undo / Redo |
| N | Translate | ⌘F | Search tools |
| K | Sketch on Top plane | ⇧⌘I | Import file |
| ⇧⌘F | Zoom to fit | ⇧⌘P | Import project |
| ⌥⌘M | Measure | ⇧⌘V | Variable |
| ⌥⌘S | Section view | ⌥⌘P | History |
Sketching
| Key | Tool | Key | Tool |
|---|---|---|---|
| S | Select | E | Ellipse |
| L | Line | G | Polygon |
| A | Arc | P | Point |
| I | Spline | T | Trim |
| R | Rectangle | O | Offset Edge |
| C | Circle | Return | Done |
| Esc | End line → deselect → leave sketch | ⌘⌫ | Delete selection |